How To Set Simple Keyword-based Chatbot
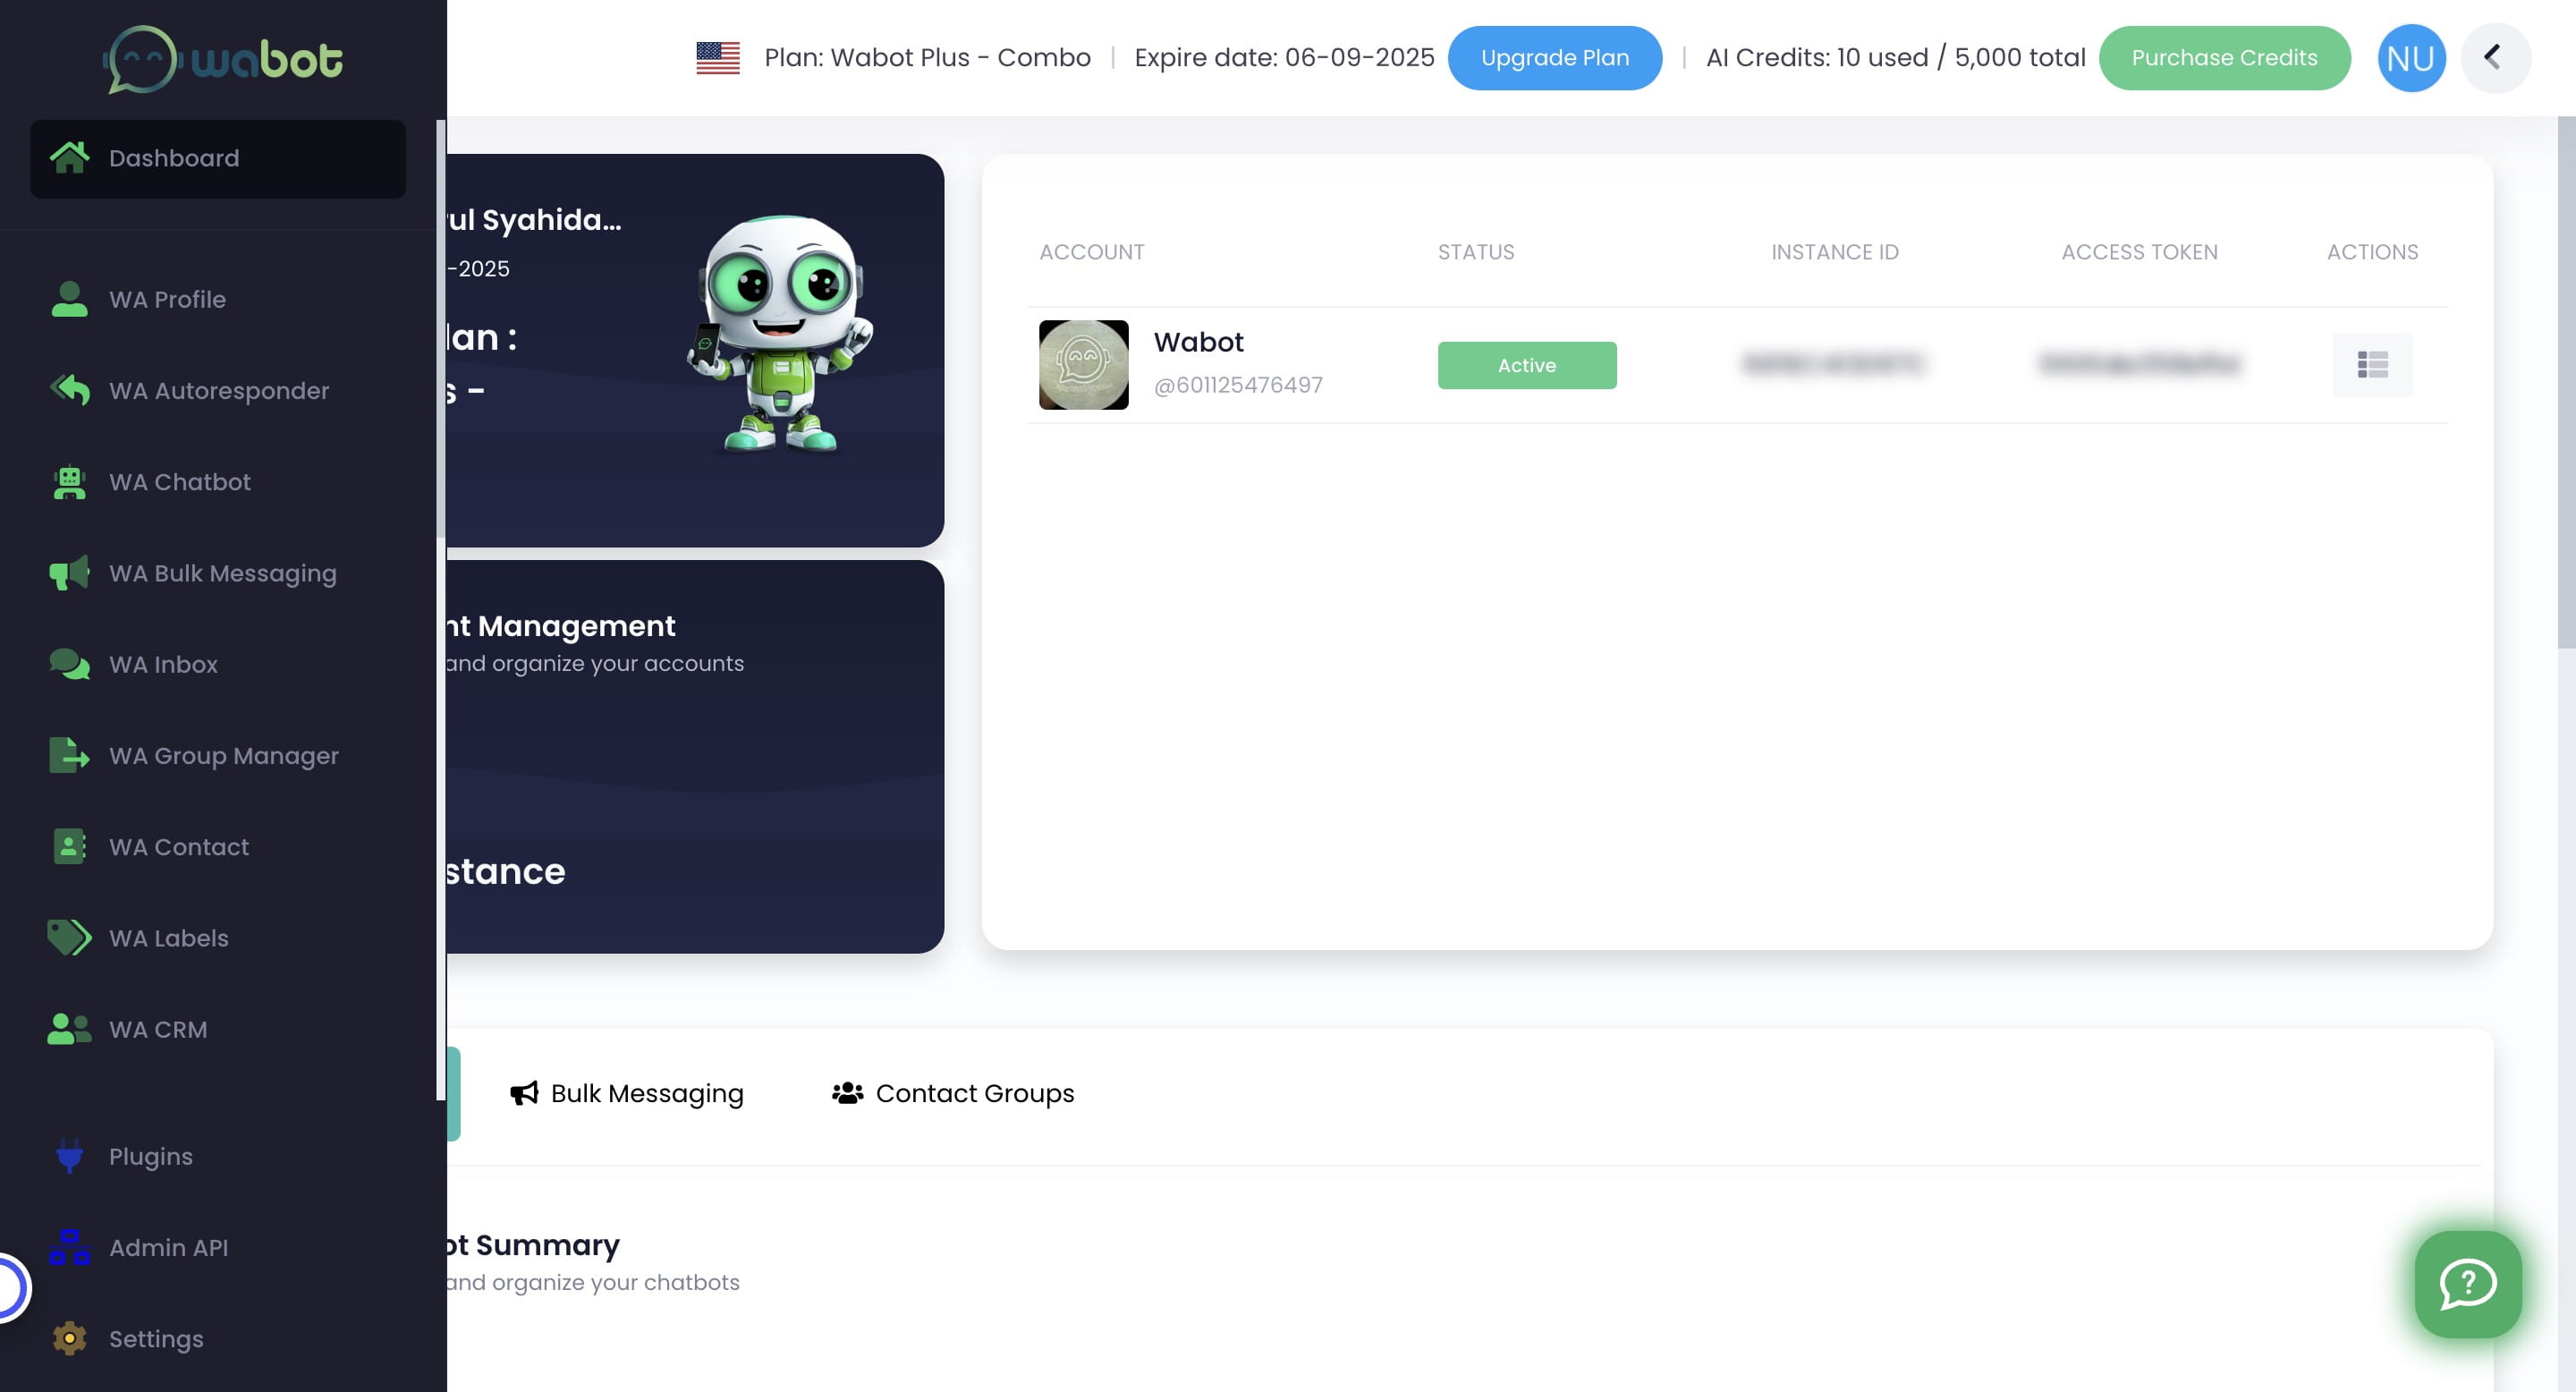
Navigate to https://app.wabot.my/dashboard
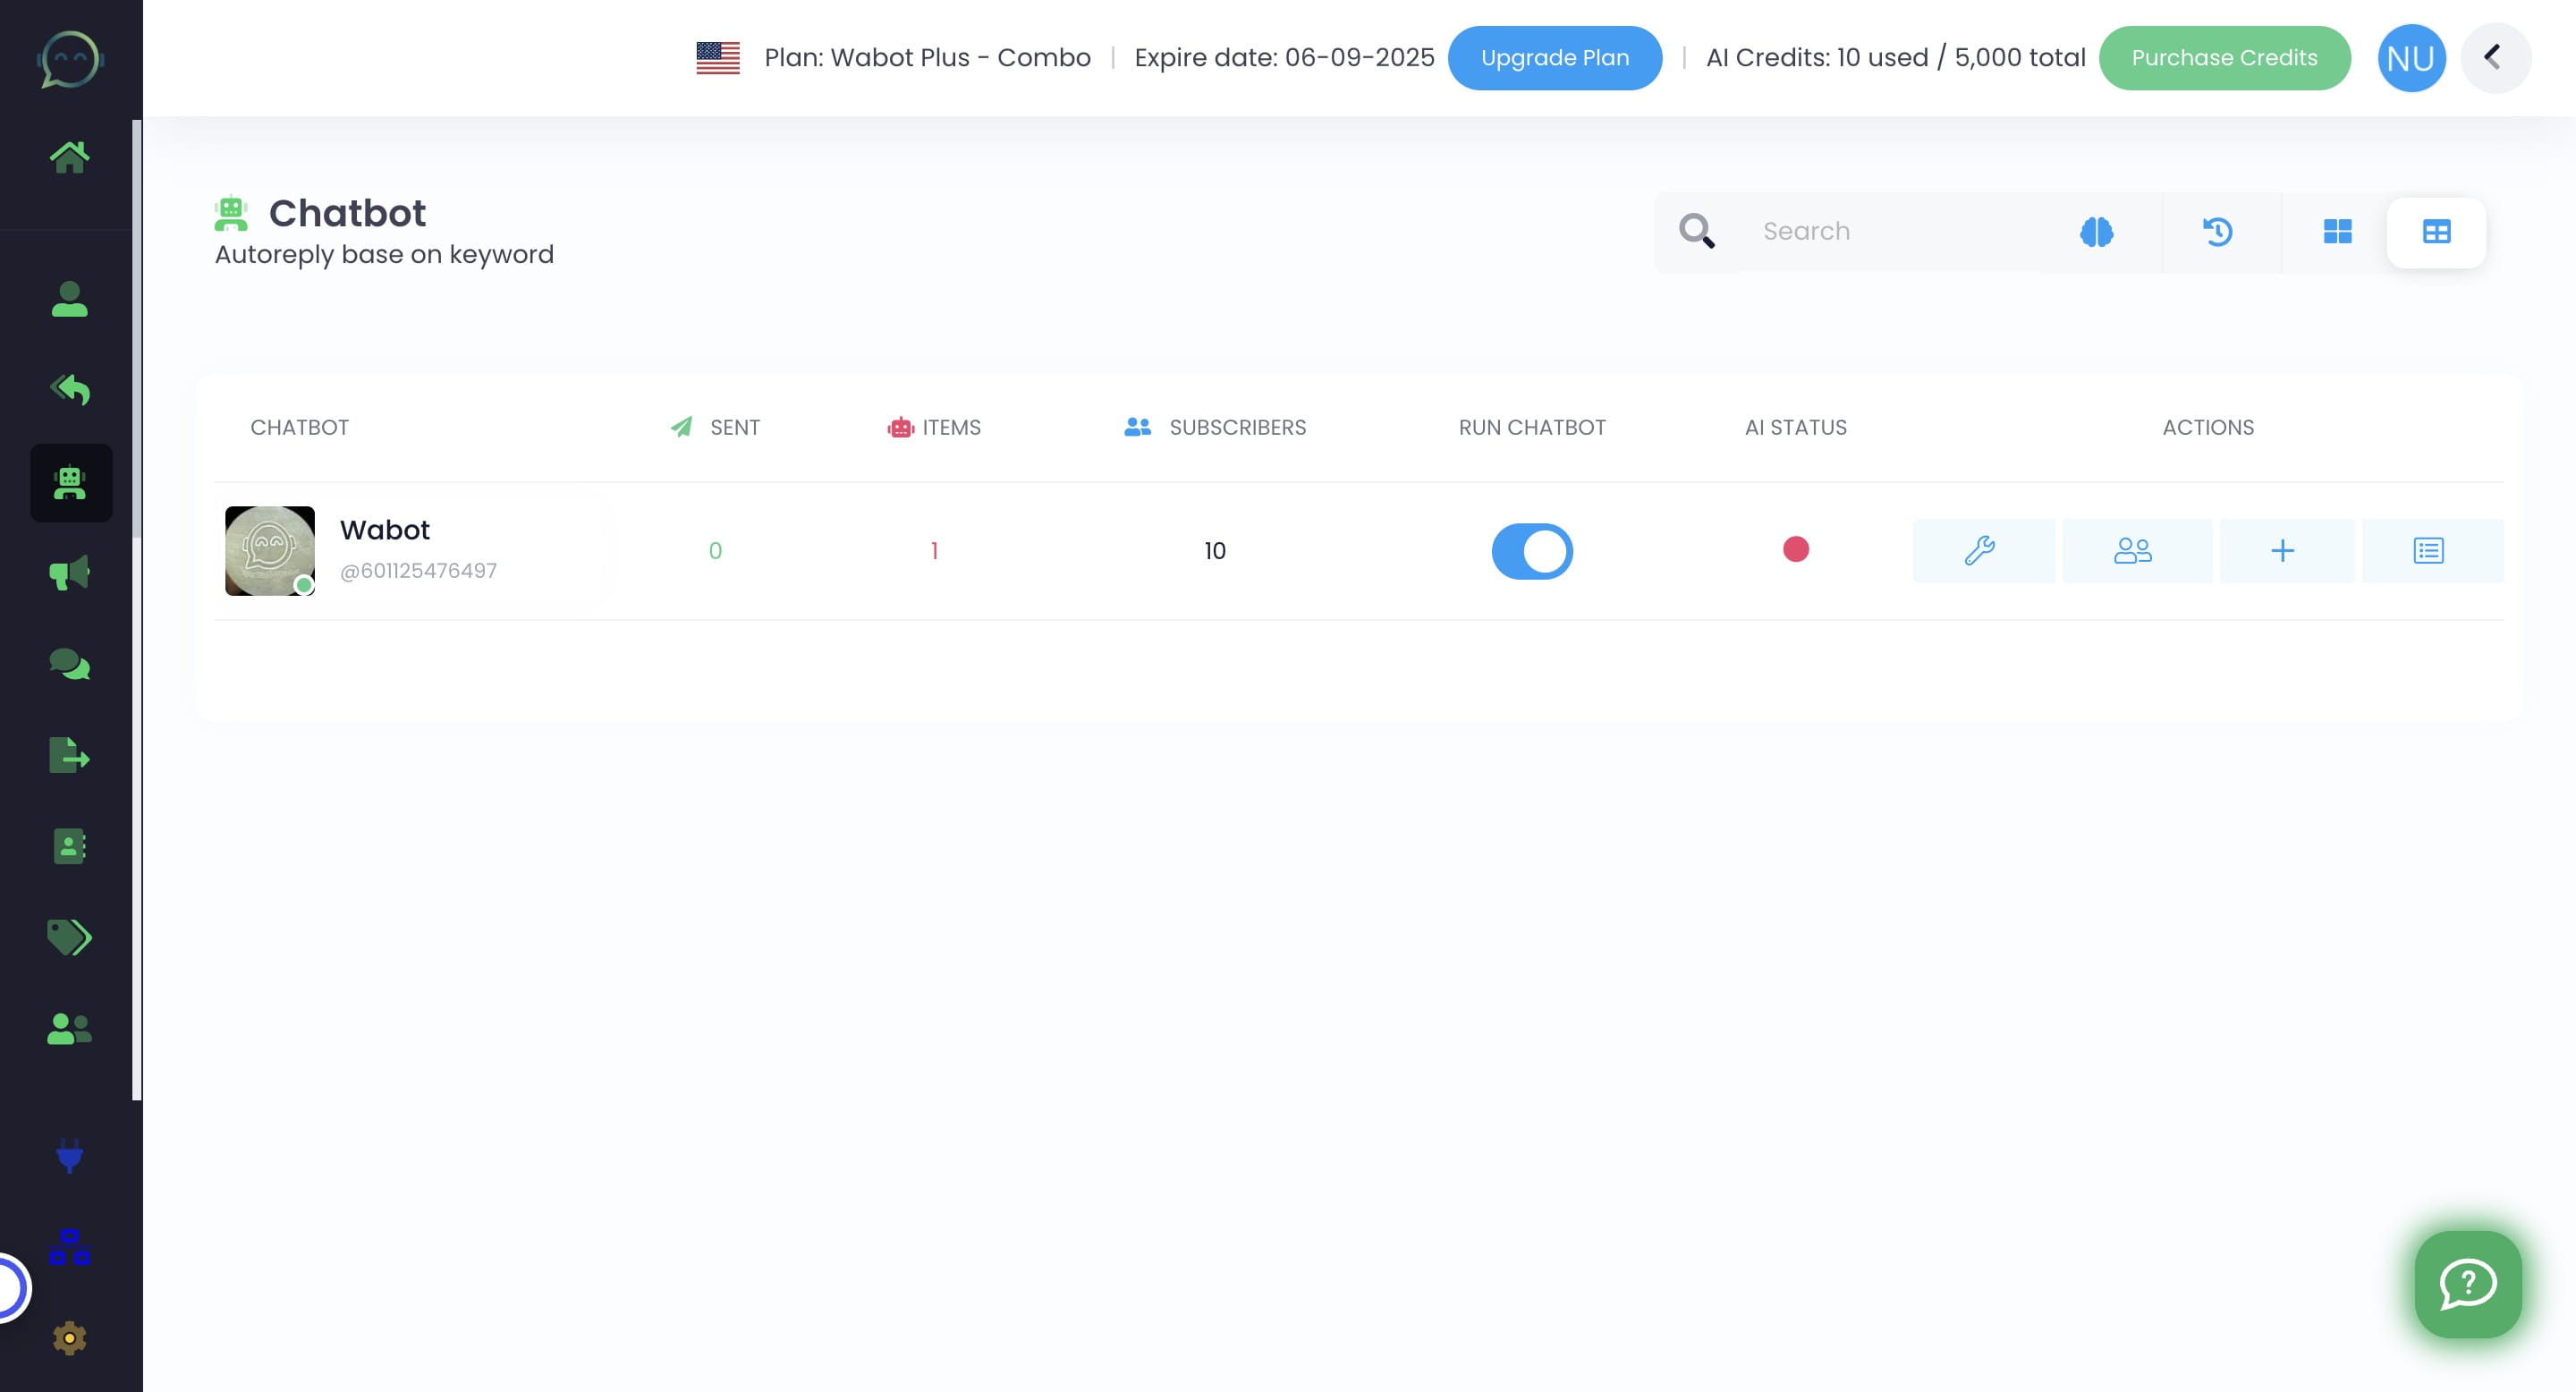
Click on "WA Chatbot"
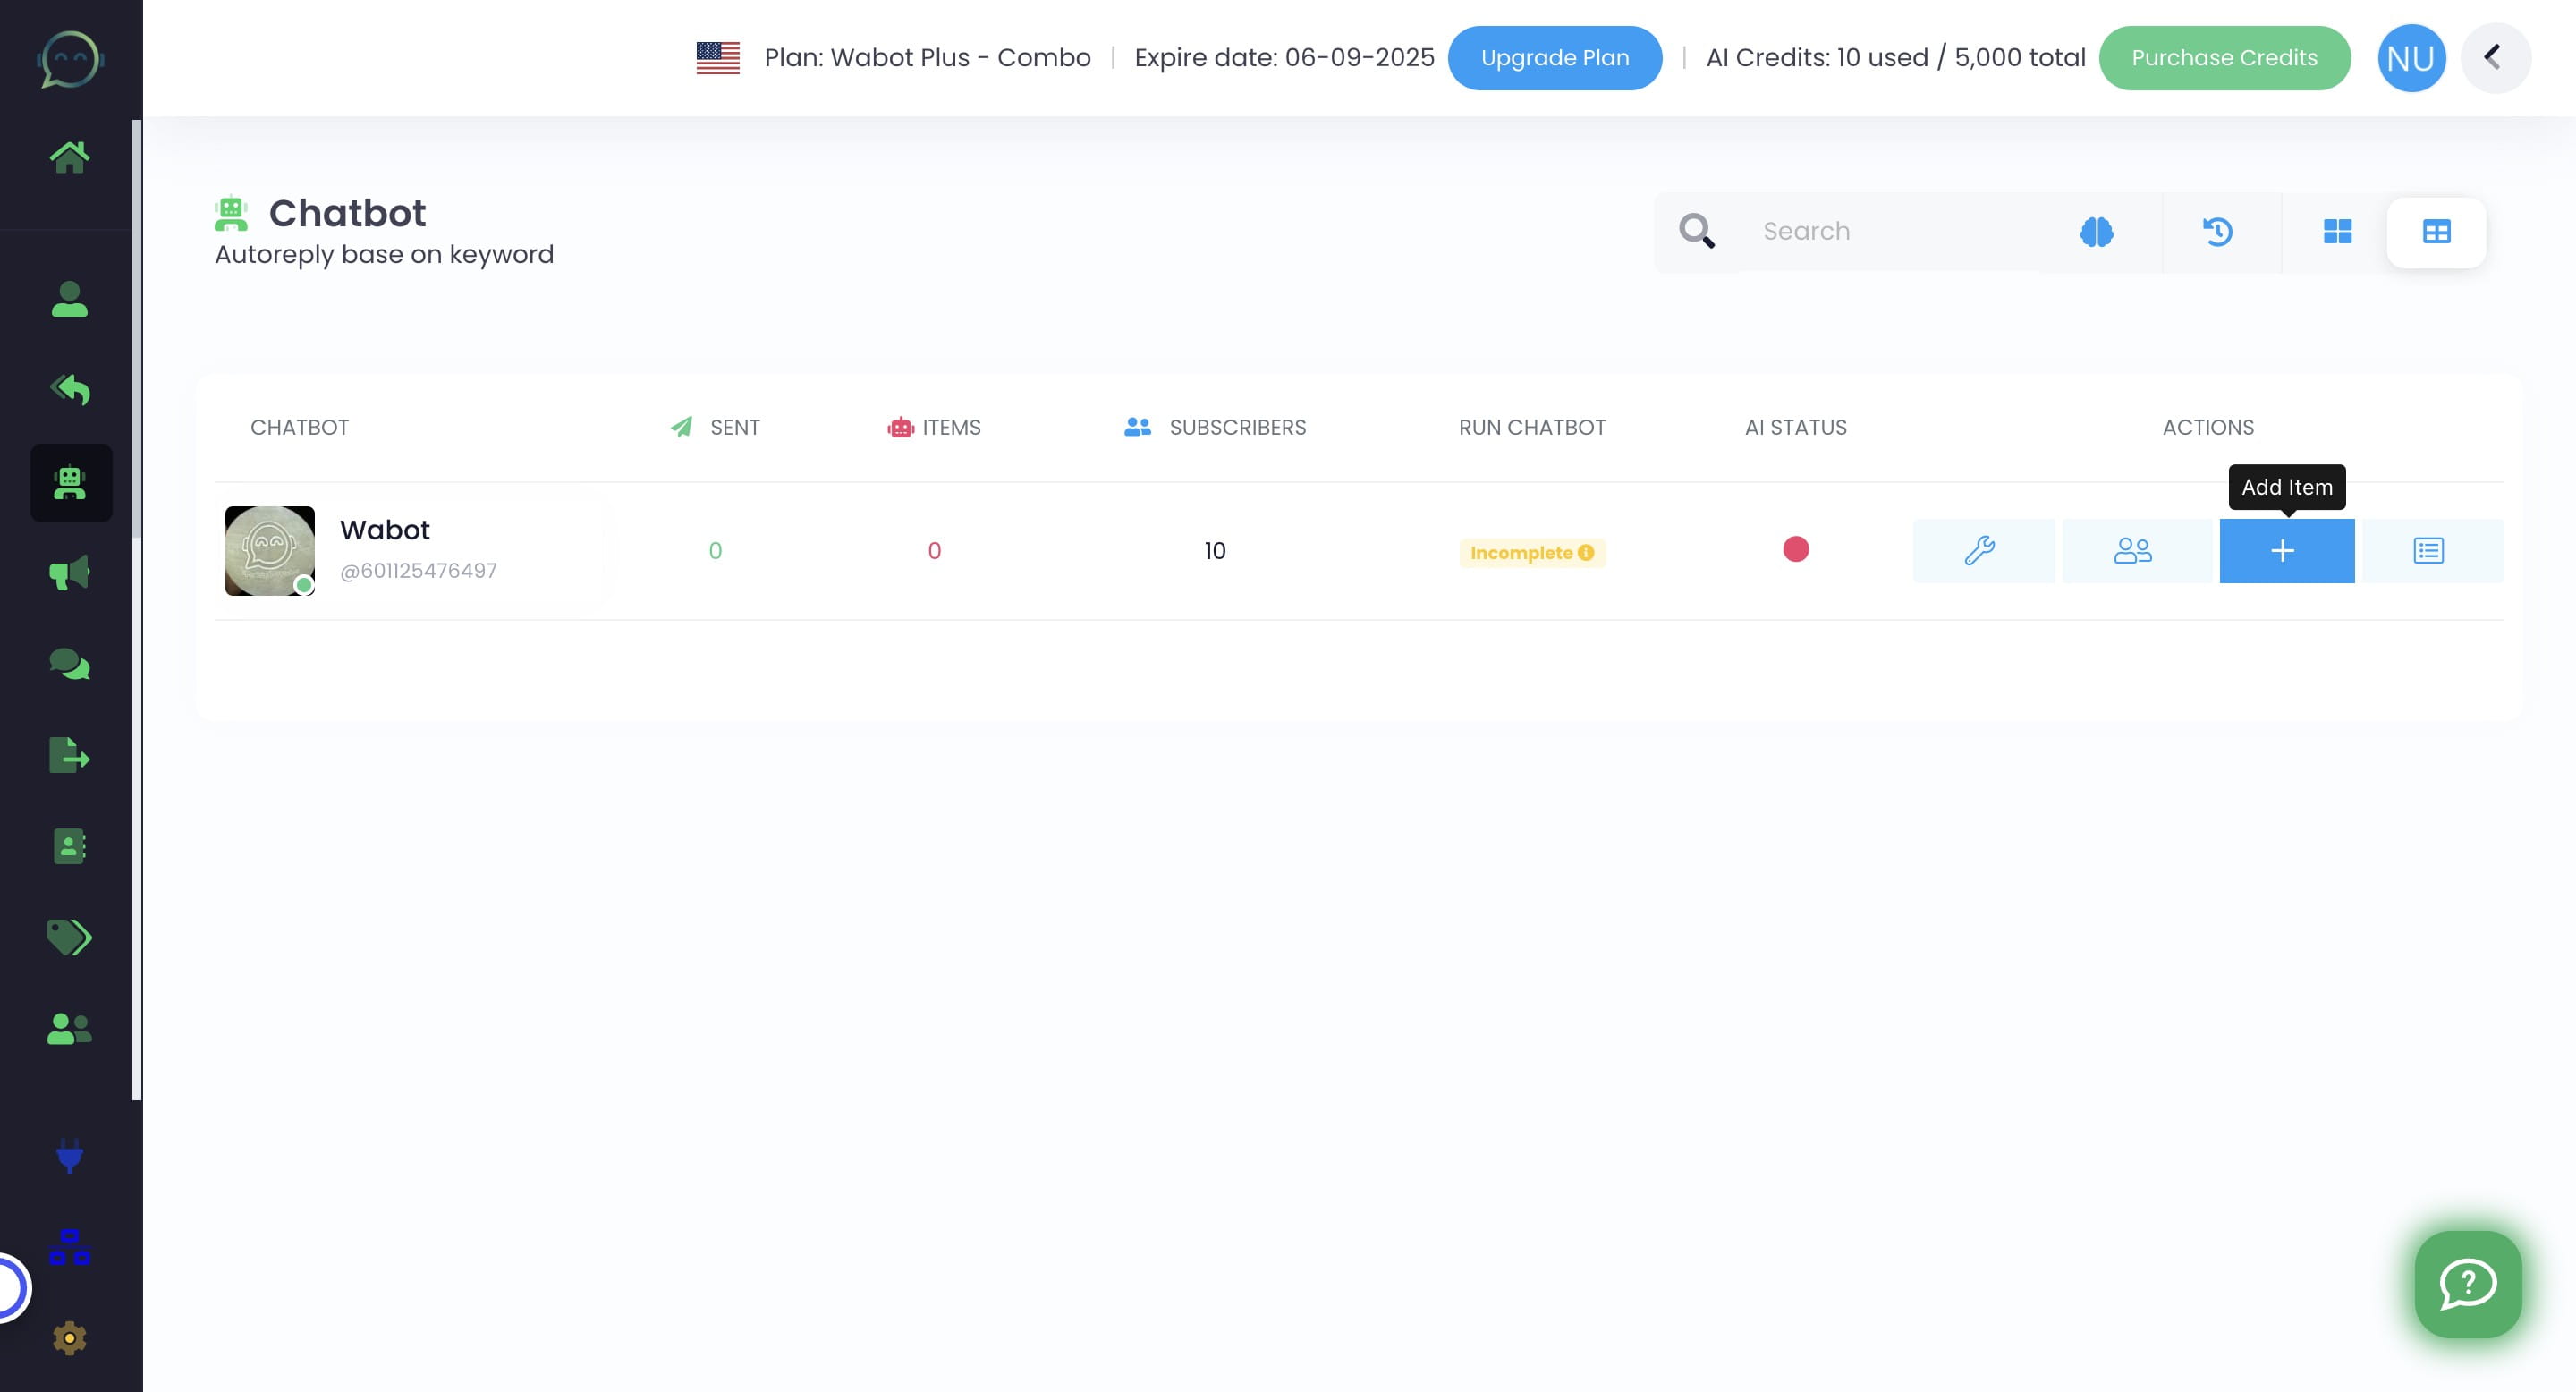
Click this icon to add item
Choose a simple name for the chatbot that you will remember and that describes its purpose
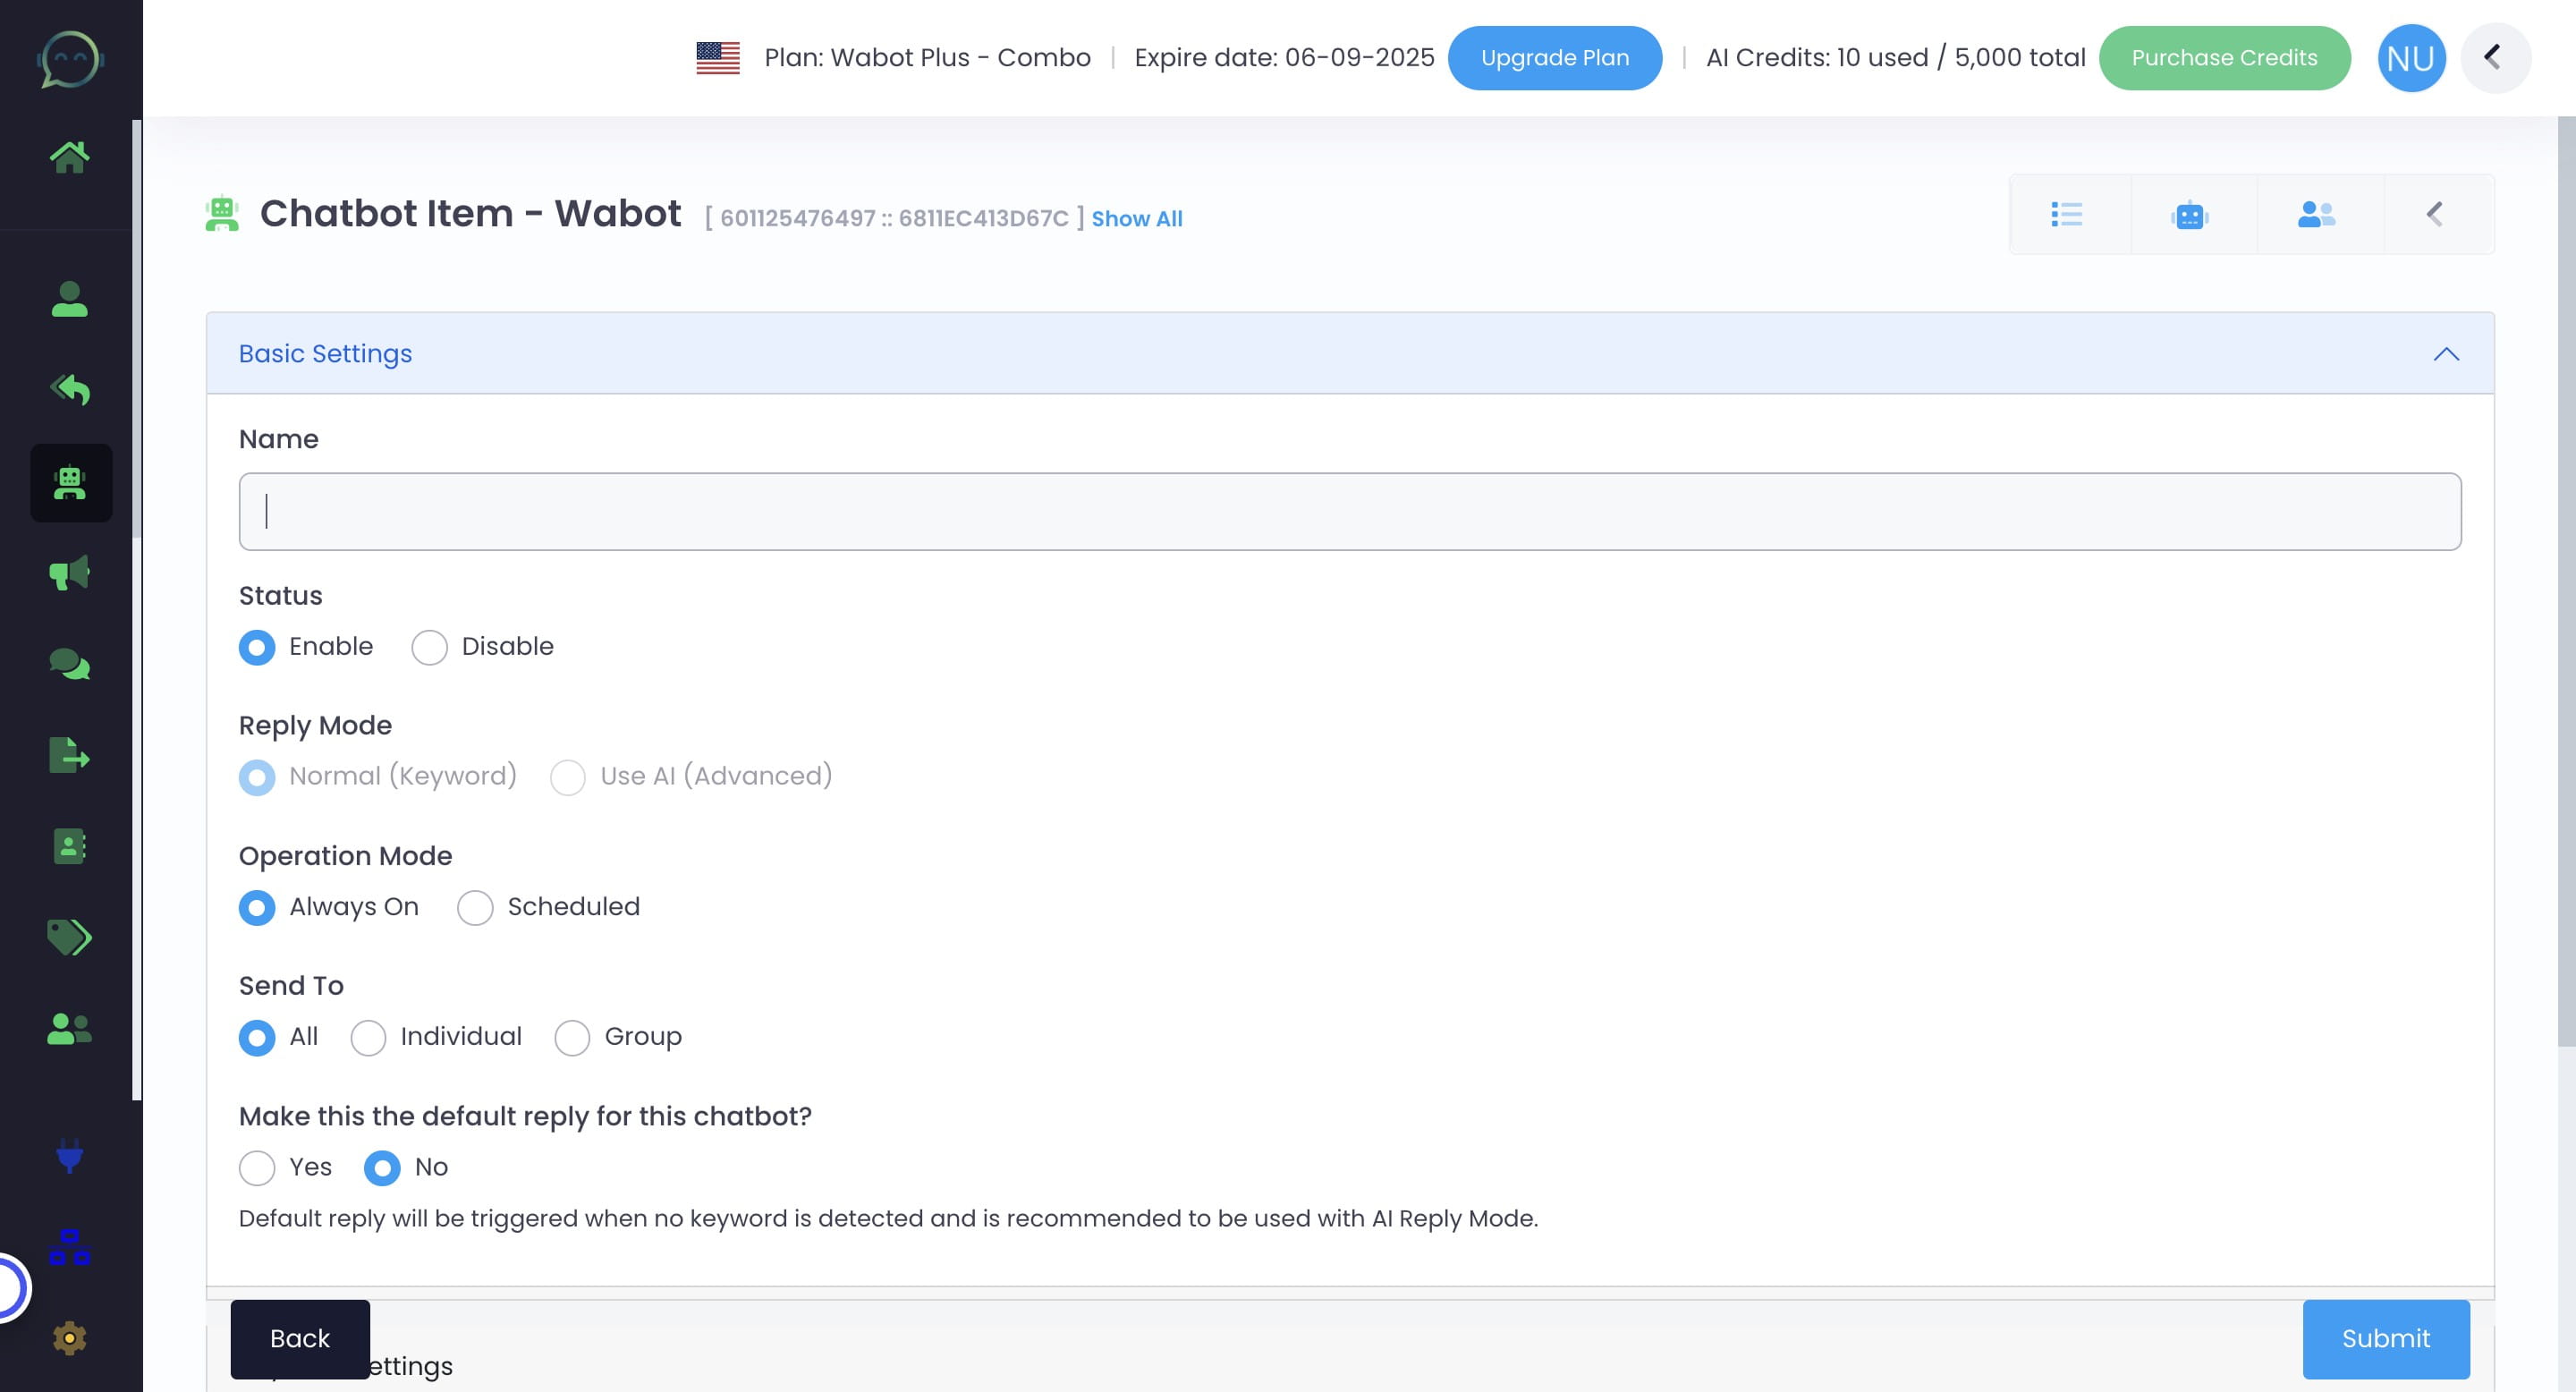
Click on "Enable"

Choose "Normal (Keyword)"
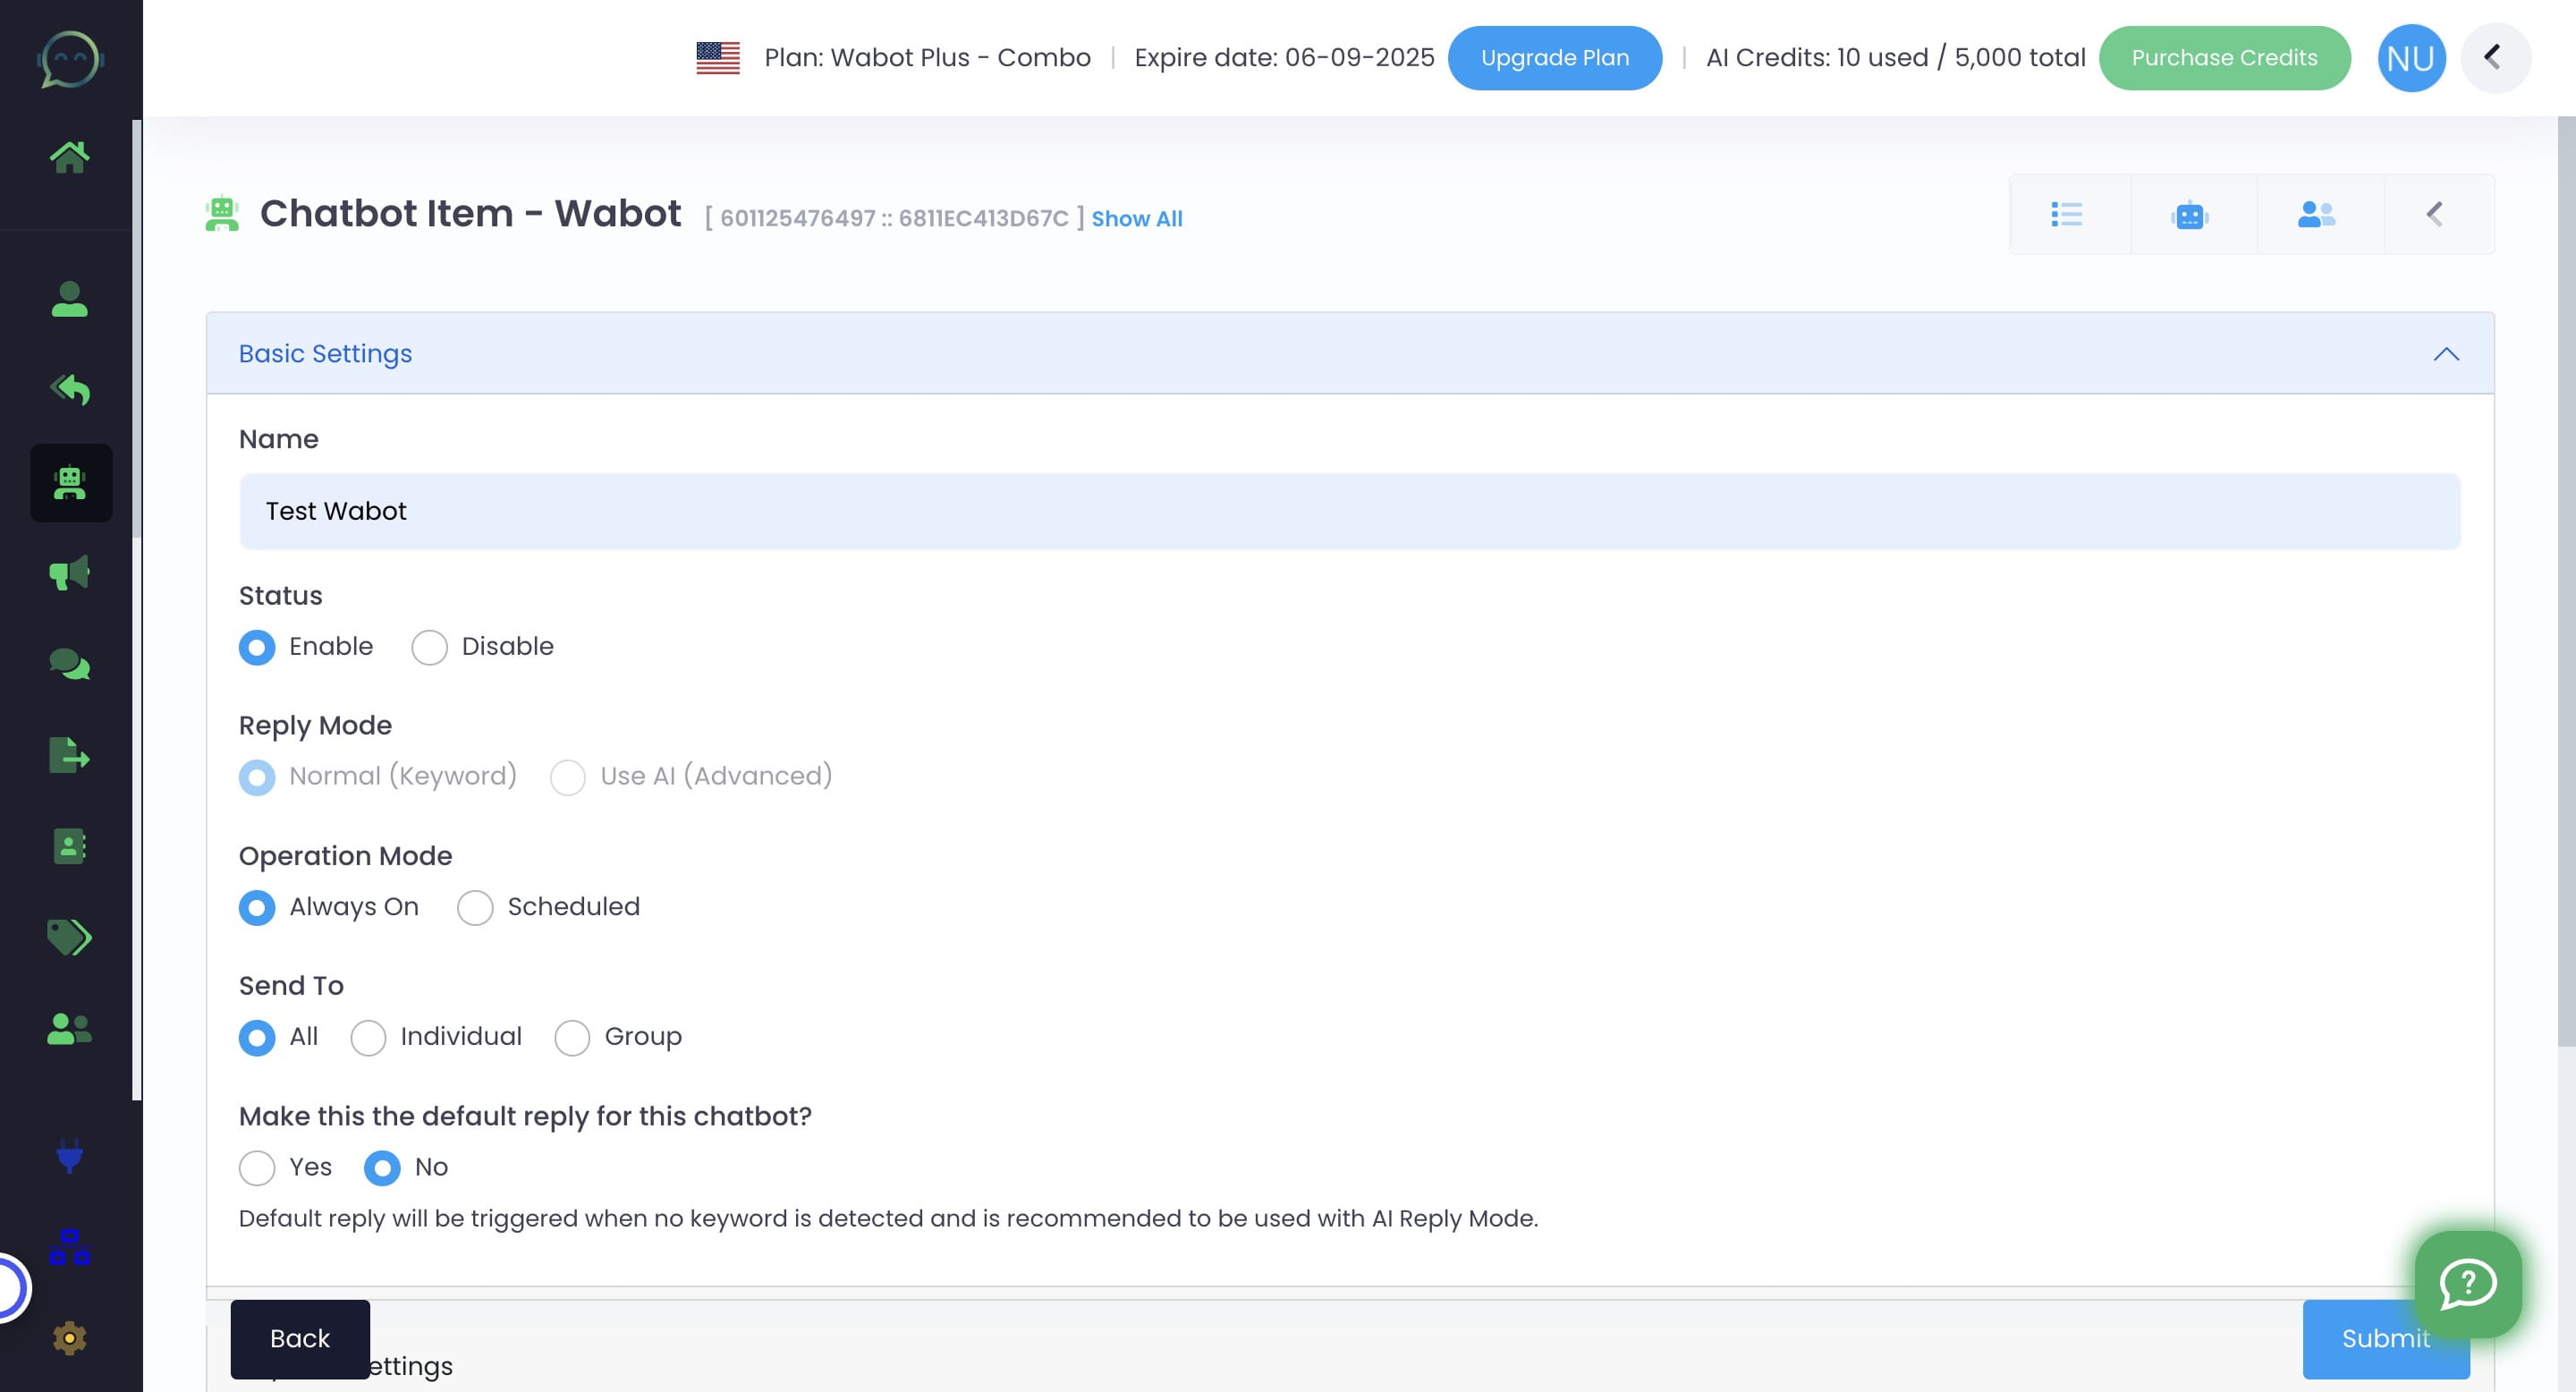
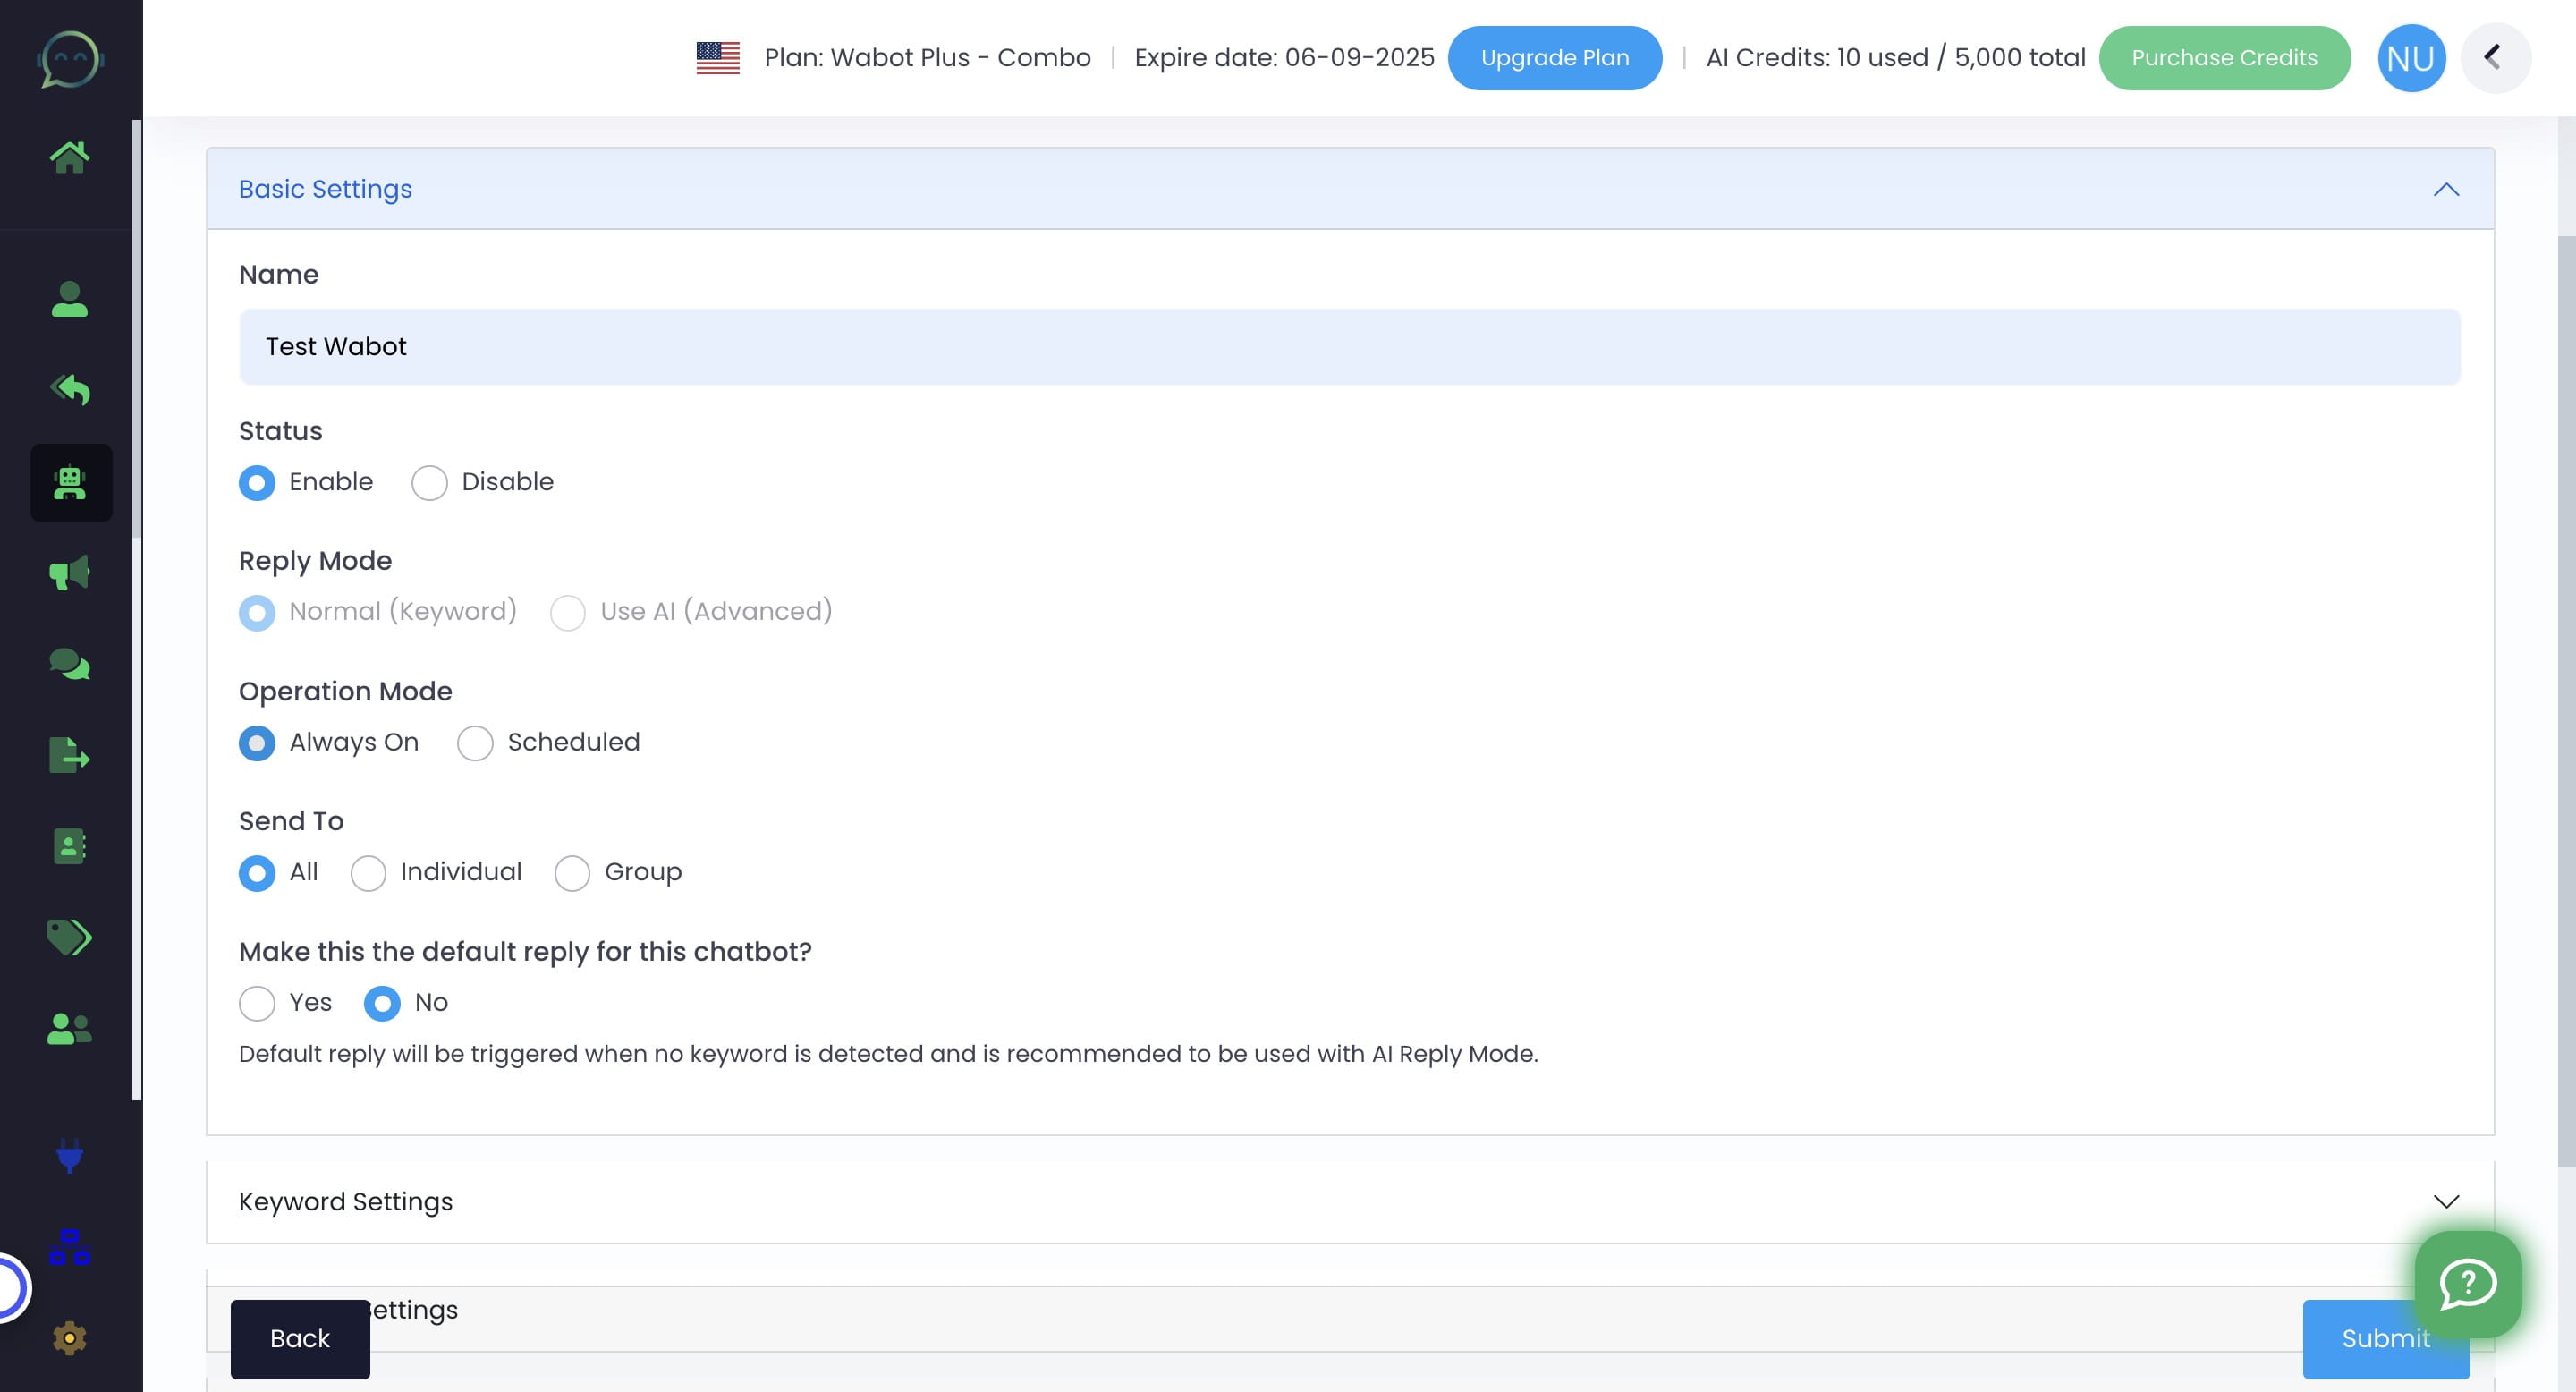
You can choose to always on the chatbot or leave it scheduled on the days you only required it for
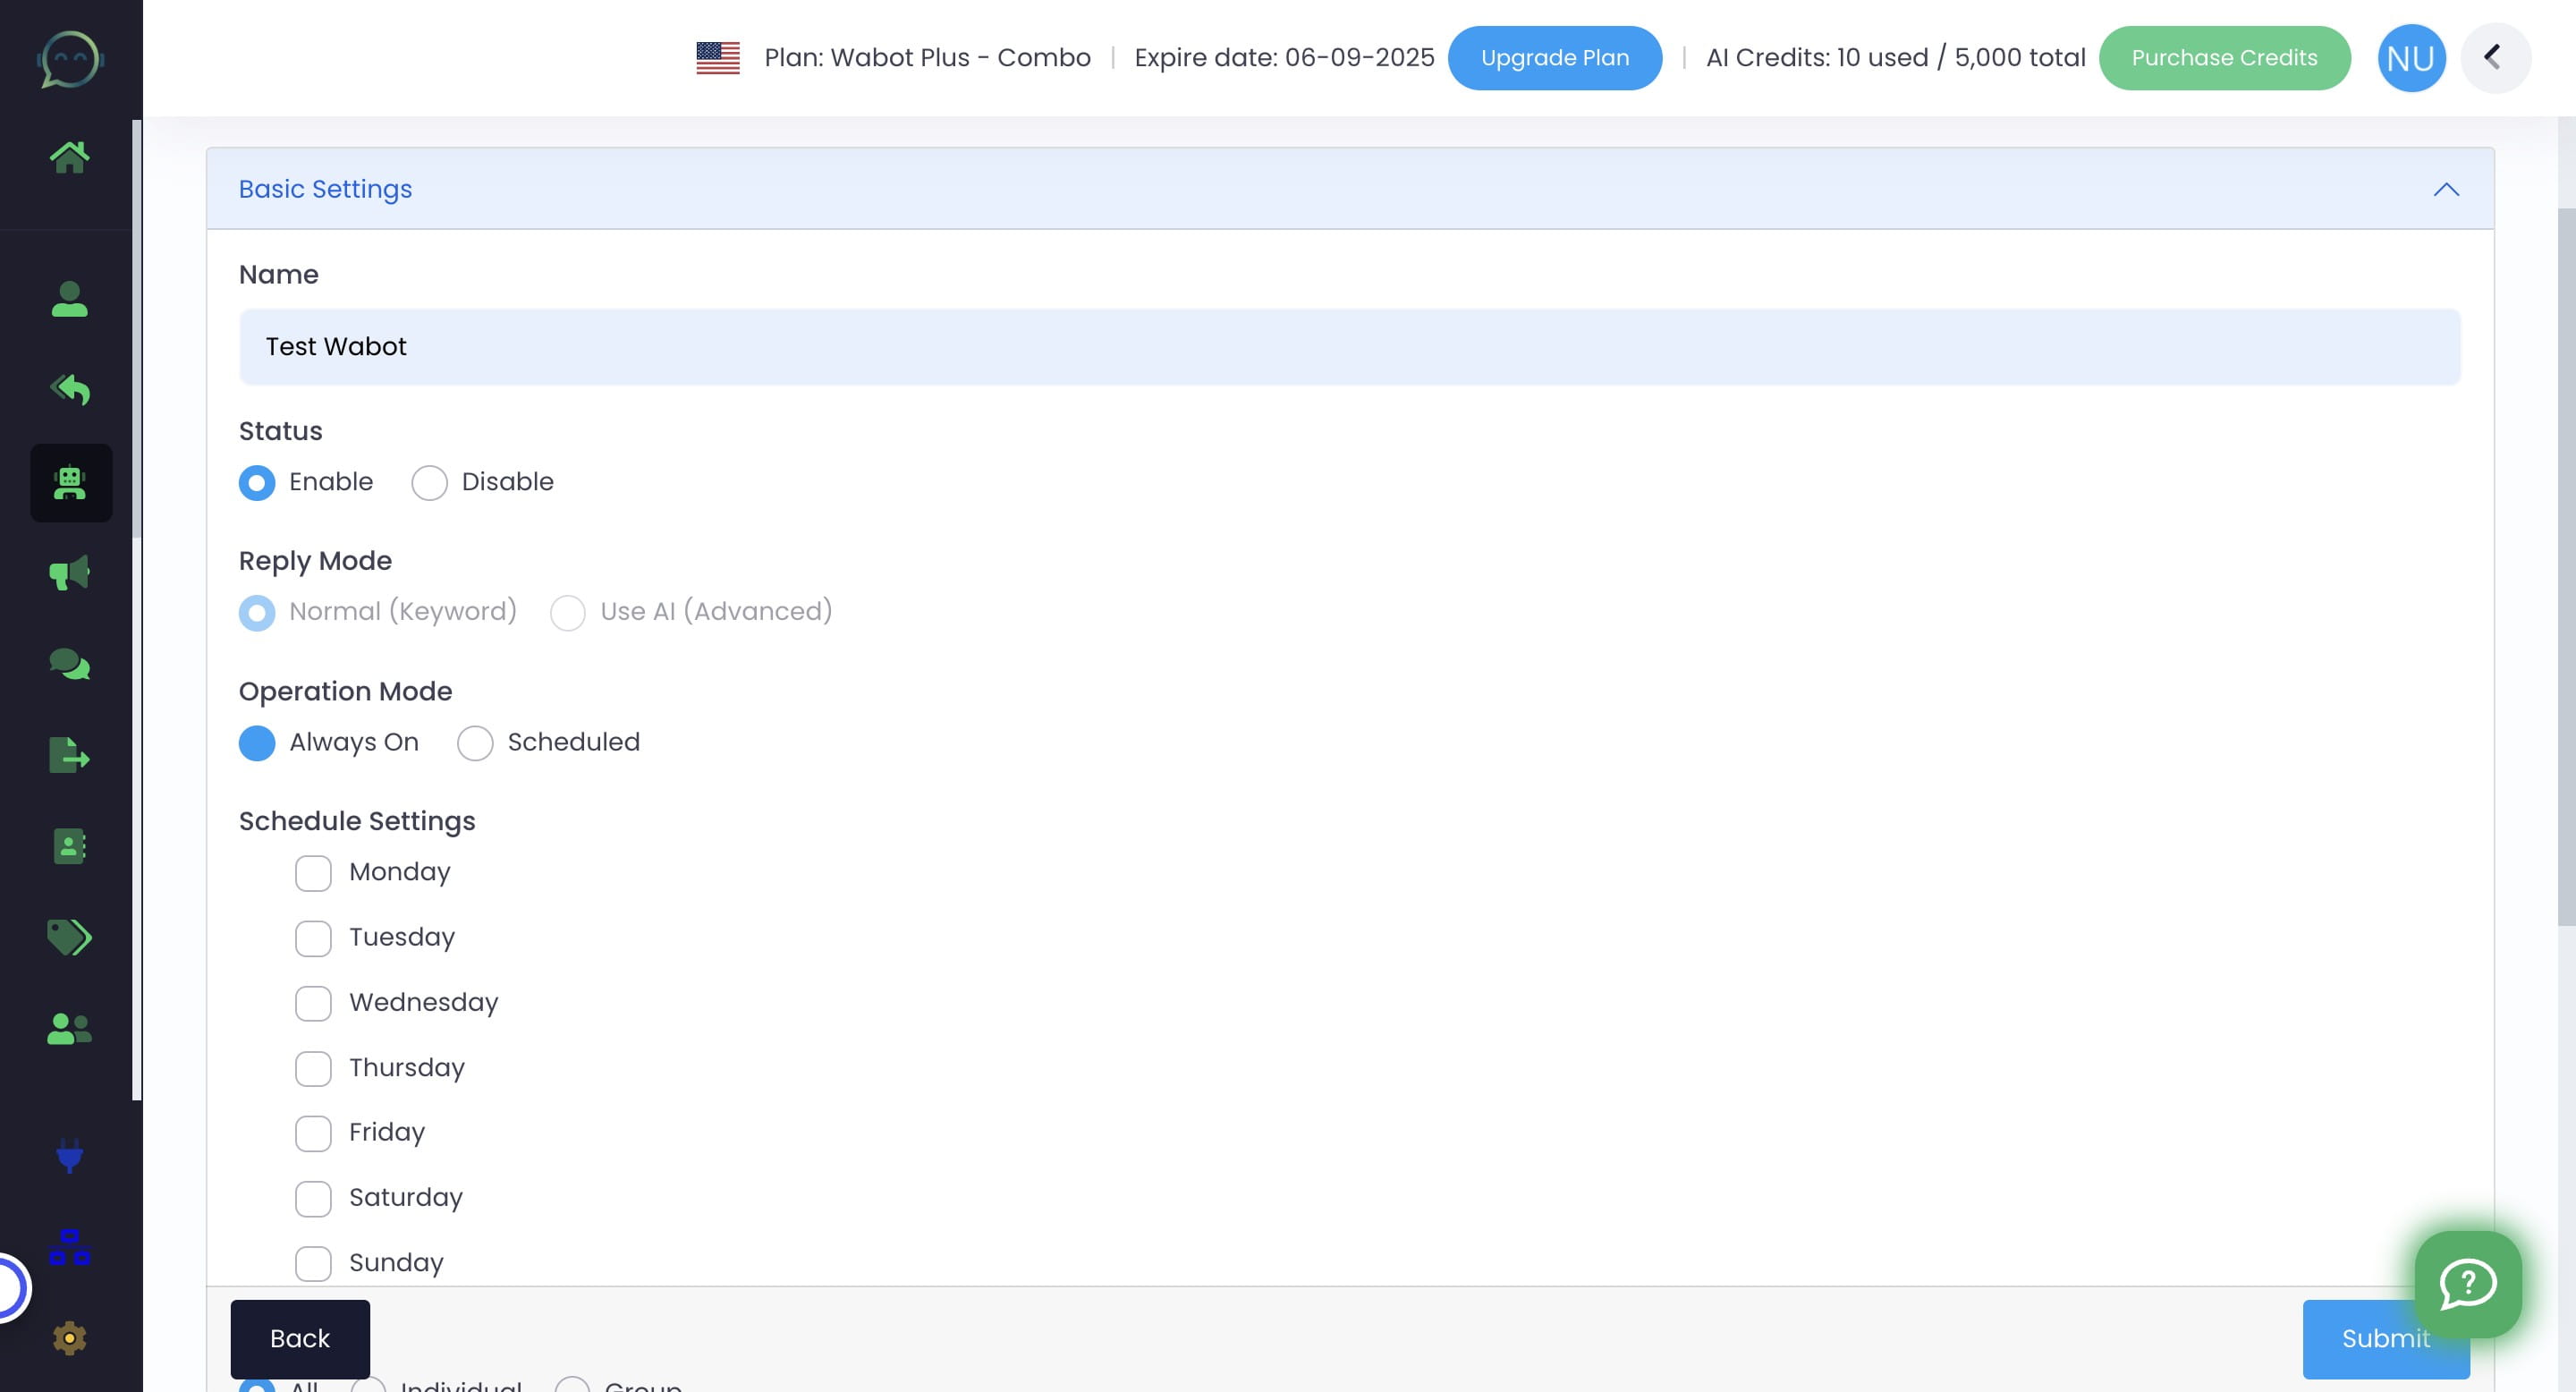
Let say you want the chatbot to just reply on certain days, choose "Scheduled" and tick on the days needed
In the usual case, we select individuals so that only customers who send us private messages will be answered by the chatbot
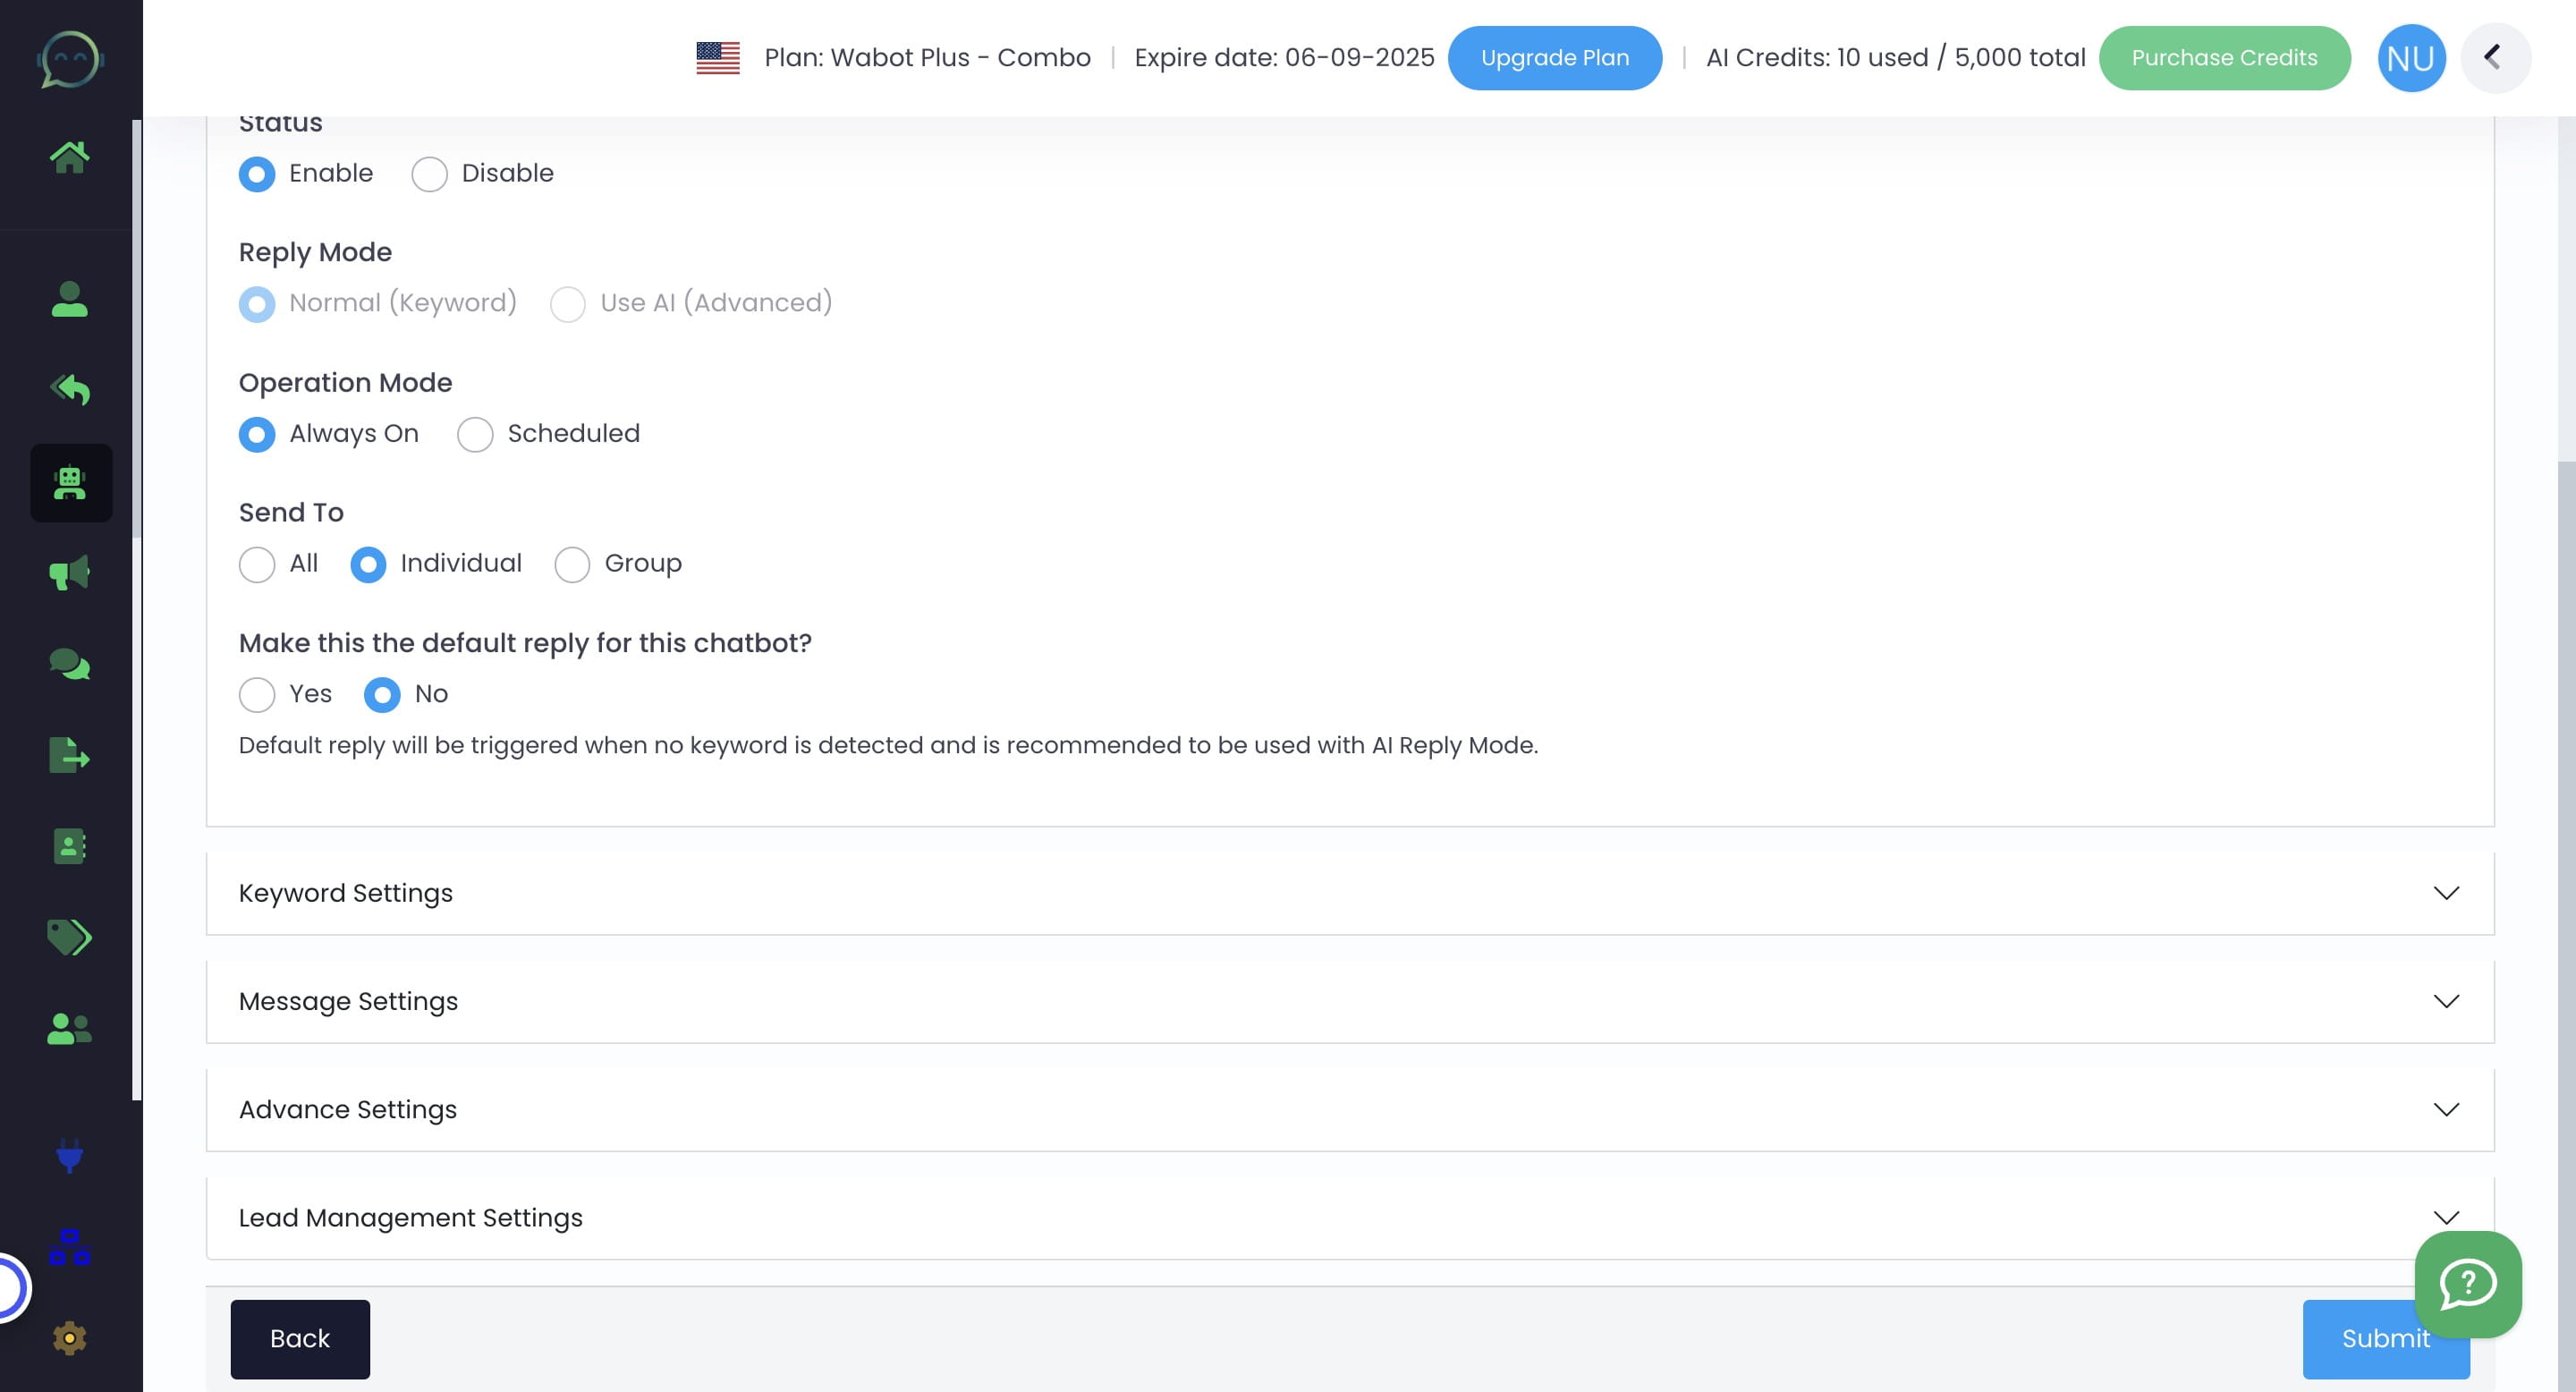
You can make this item list as default reply if the keyword is general or you serve it as a welcoming message for the first message. If not, simply choose "No"
Insert common keywords that you believe customers typically use in their responses
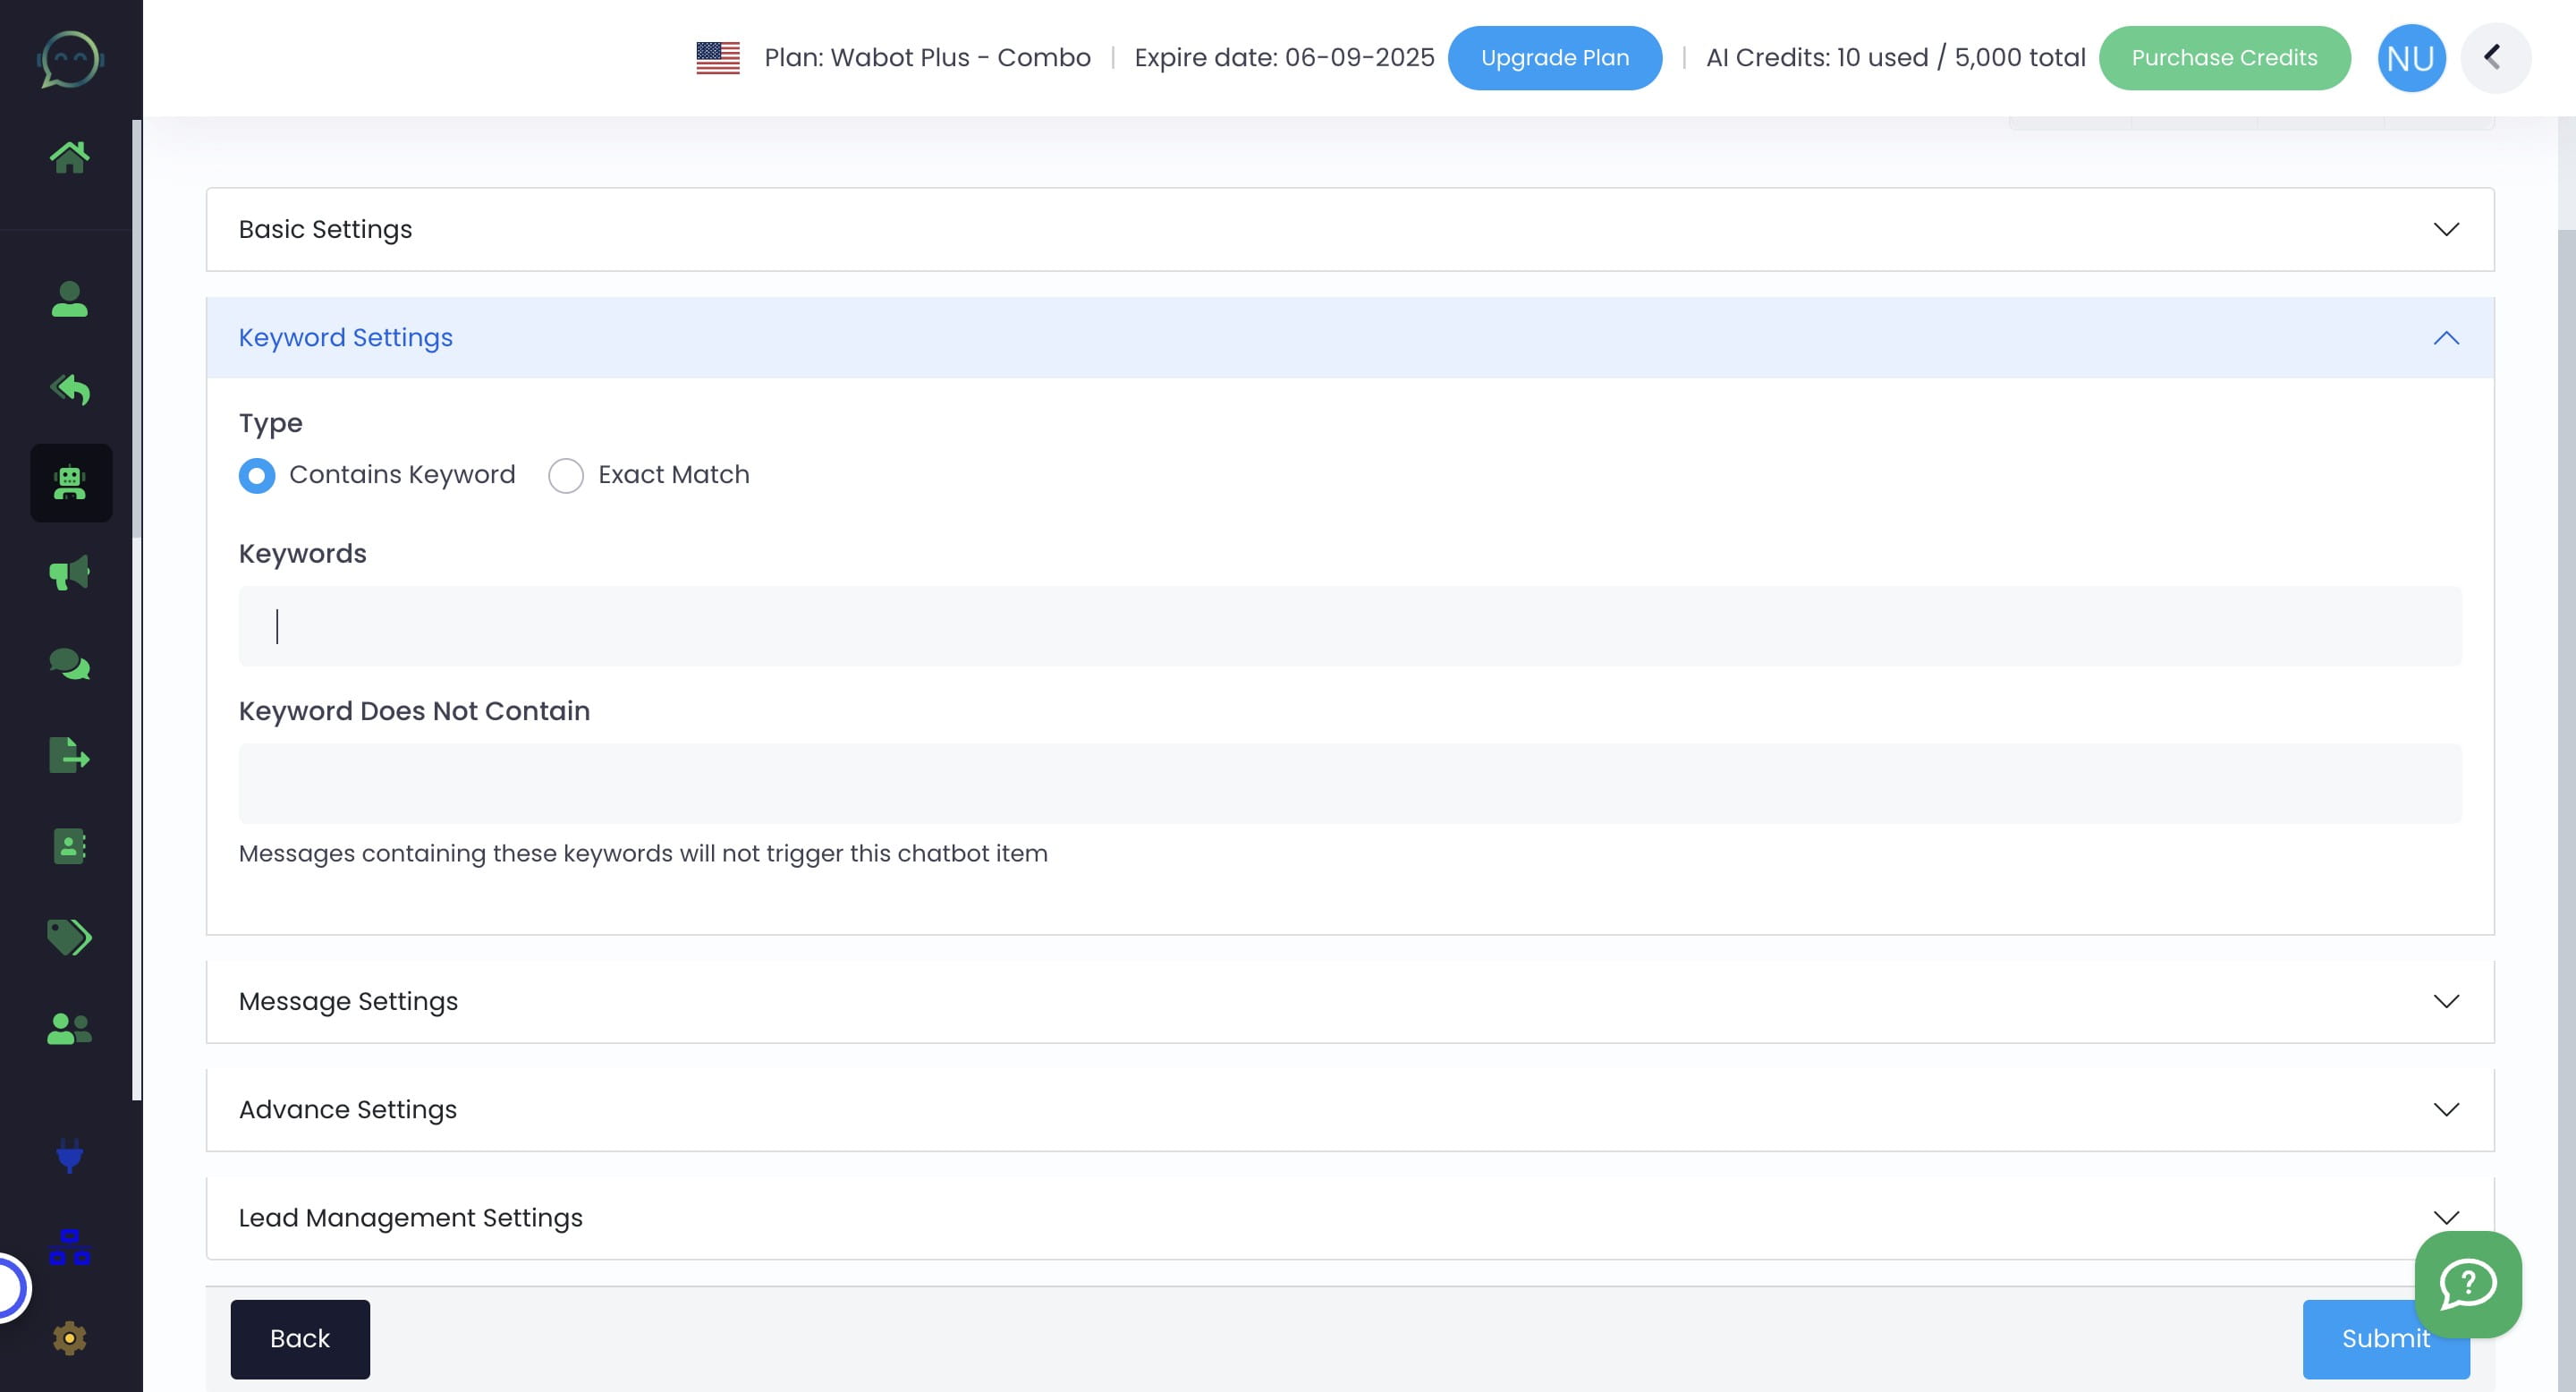
To differentiate item list by keywords and to prevent the chatbot being triggered by false keyword, you can insert the keyword that is not related here
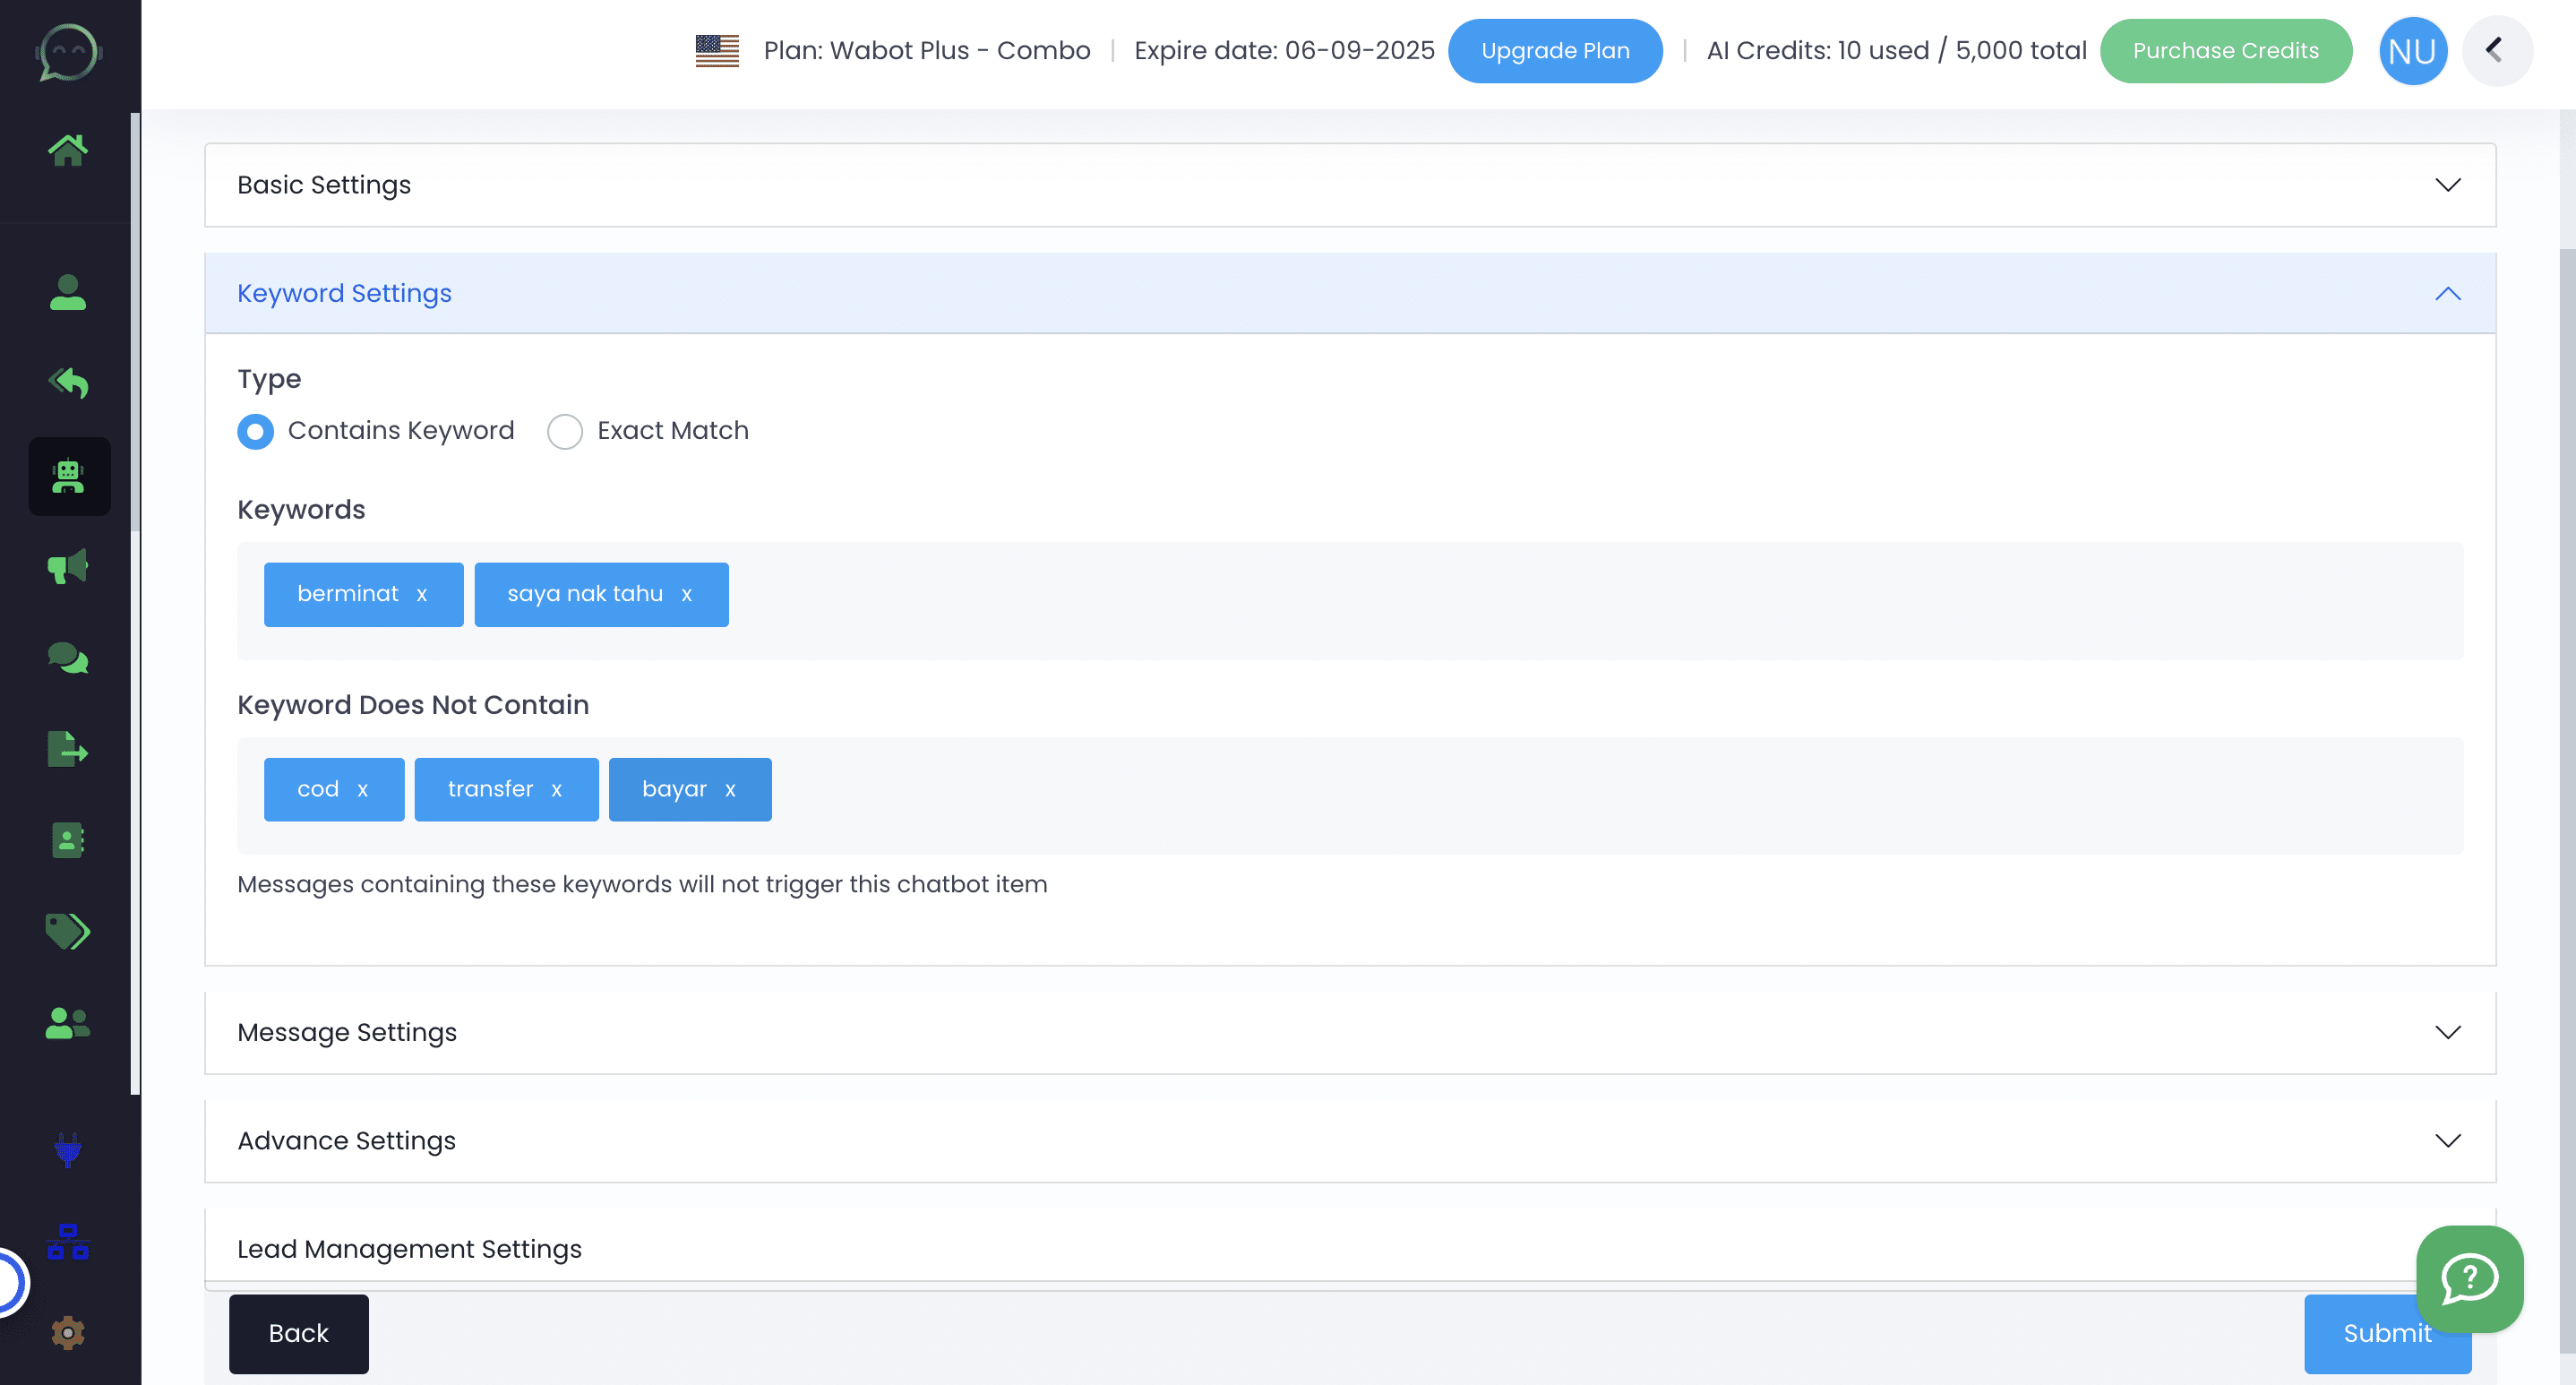
Leaving the "Keyword Does Not Contain" part also fine
Click on "Message Settings"

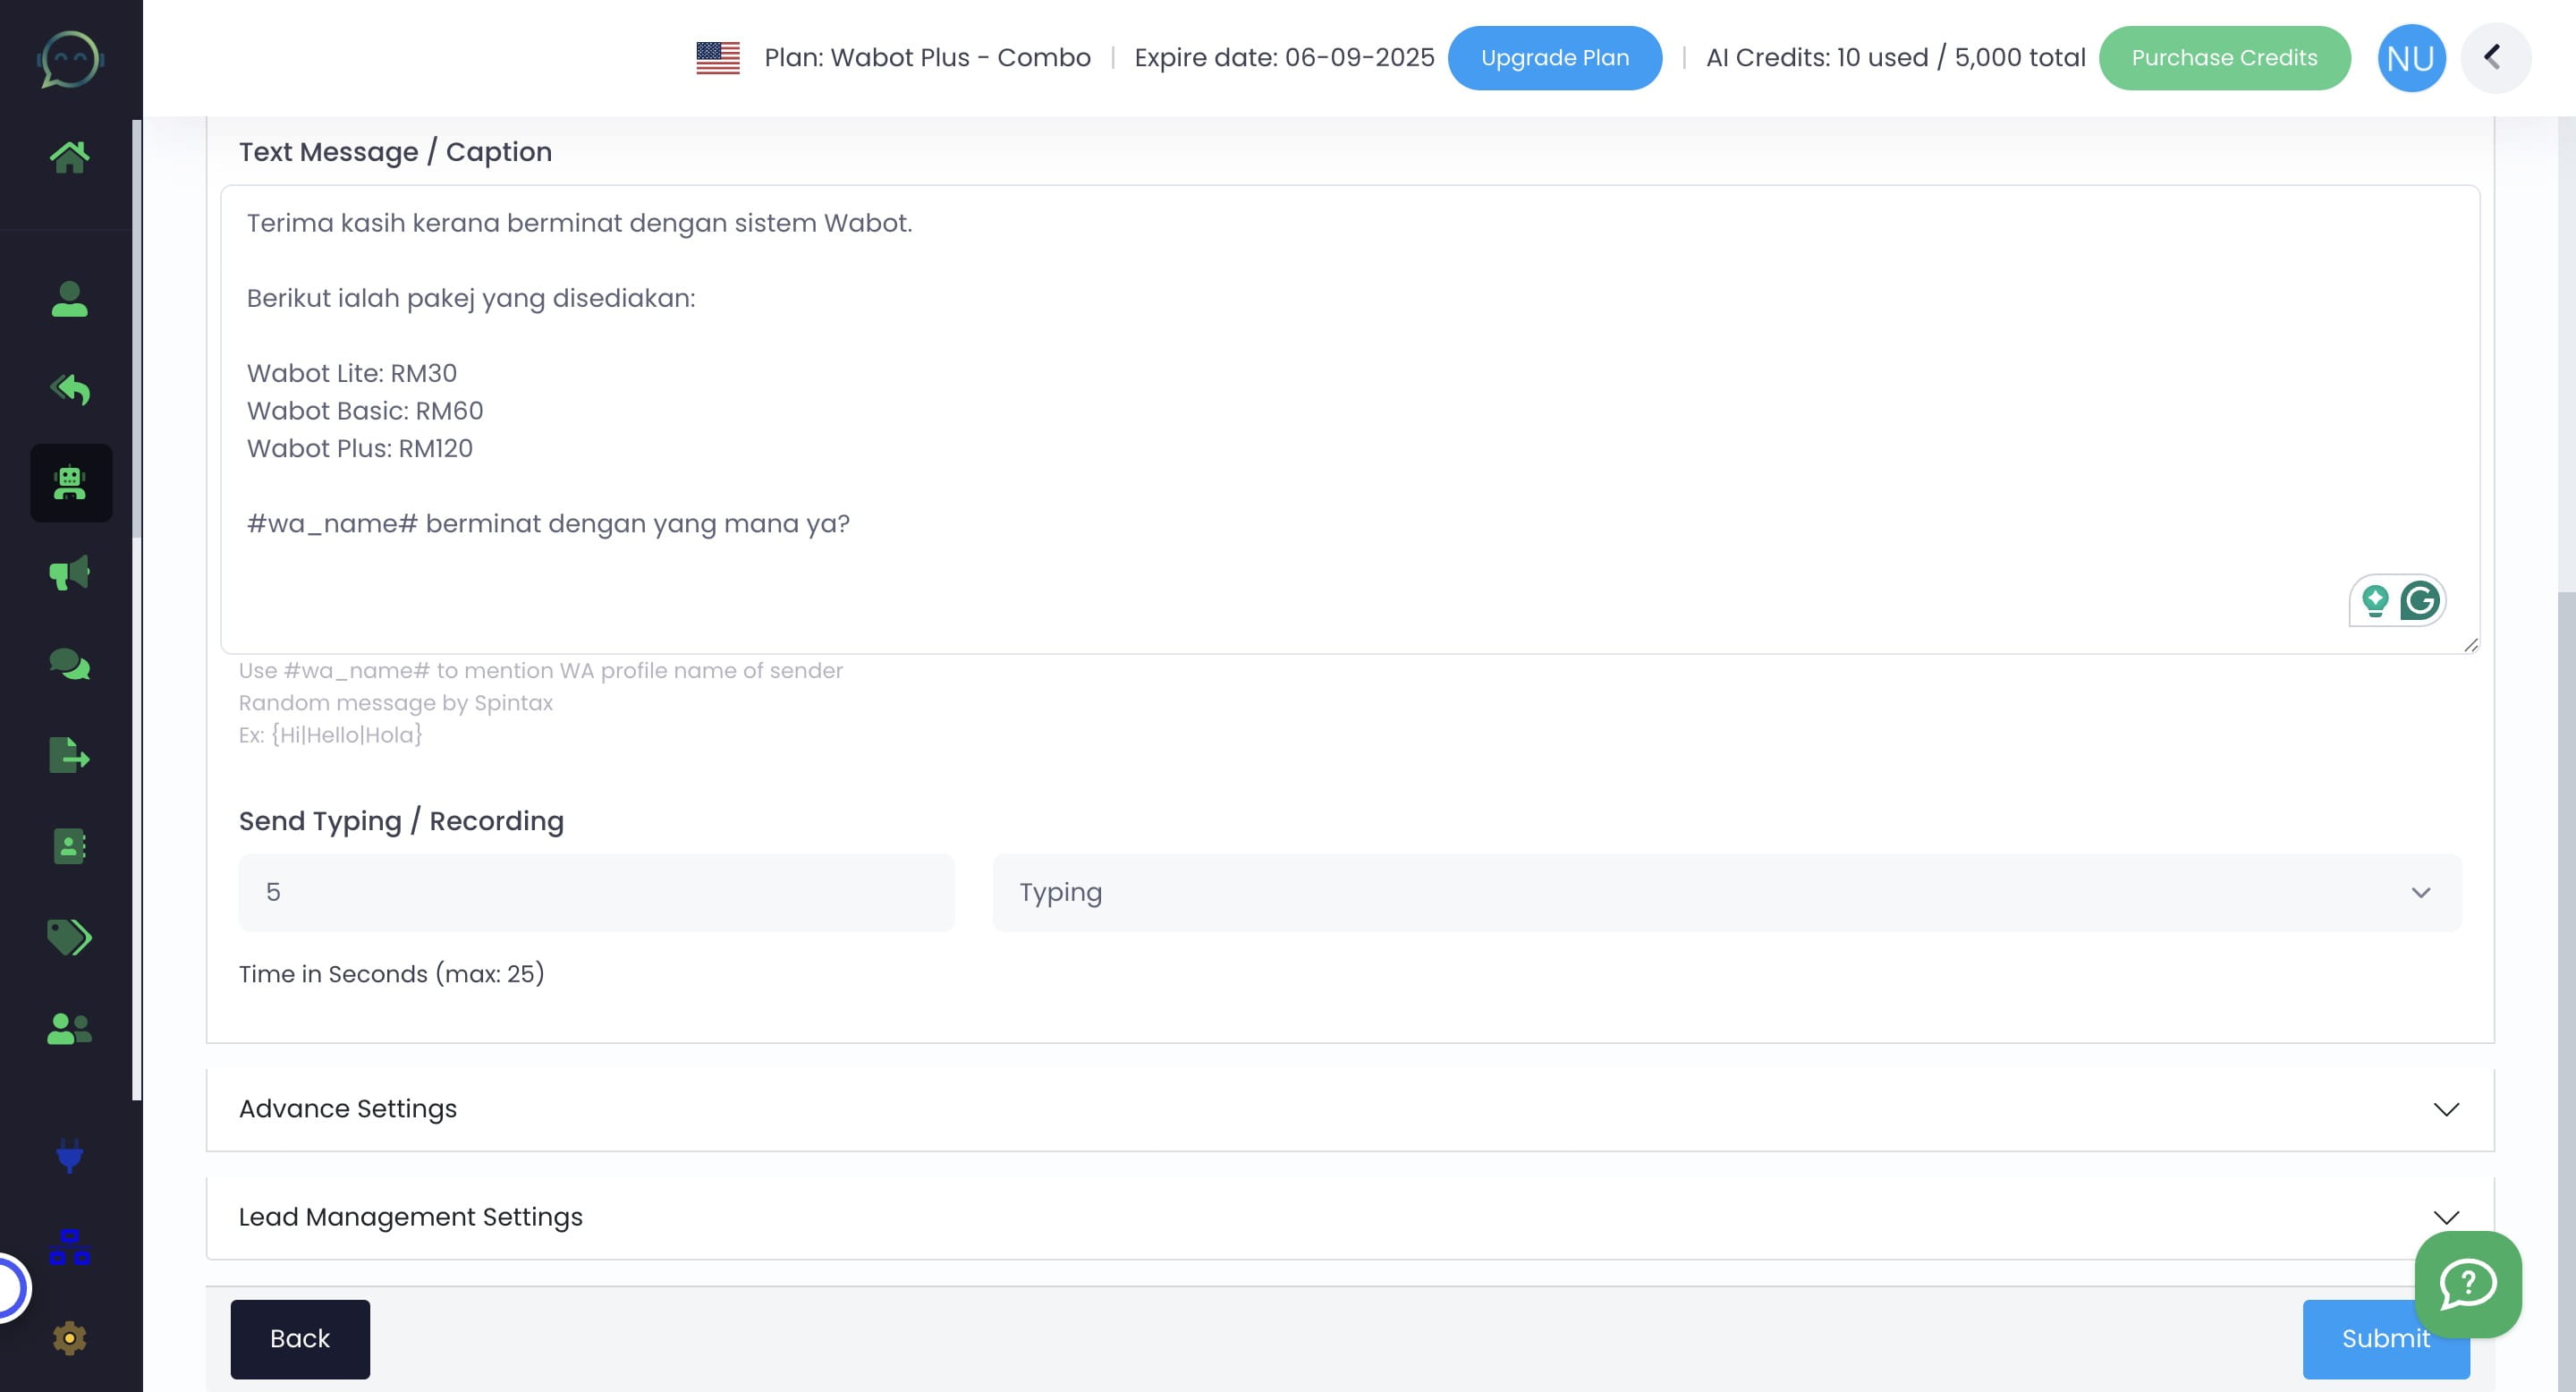
If picture is needed, you can upload it directly from your computer or if you already uploaded it in Wabot, click "File Manager"

Insert the text message for the keyword reply
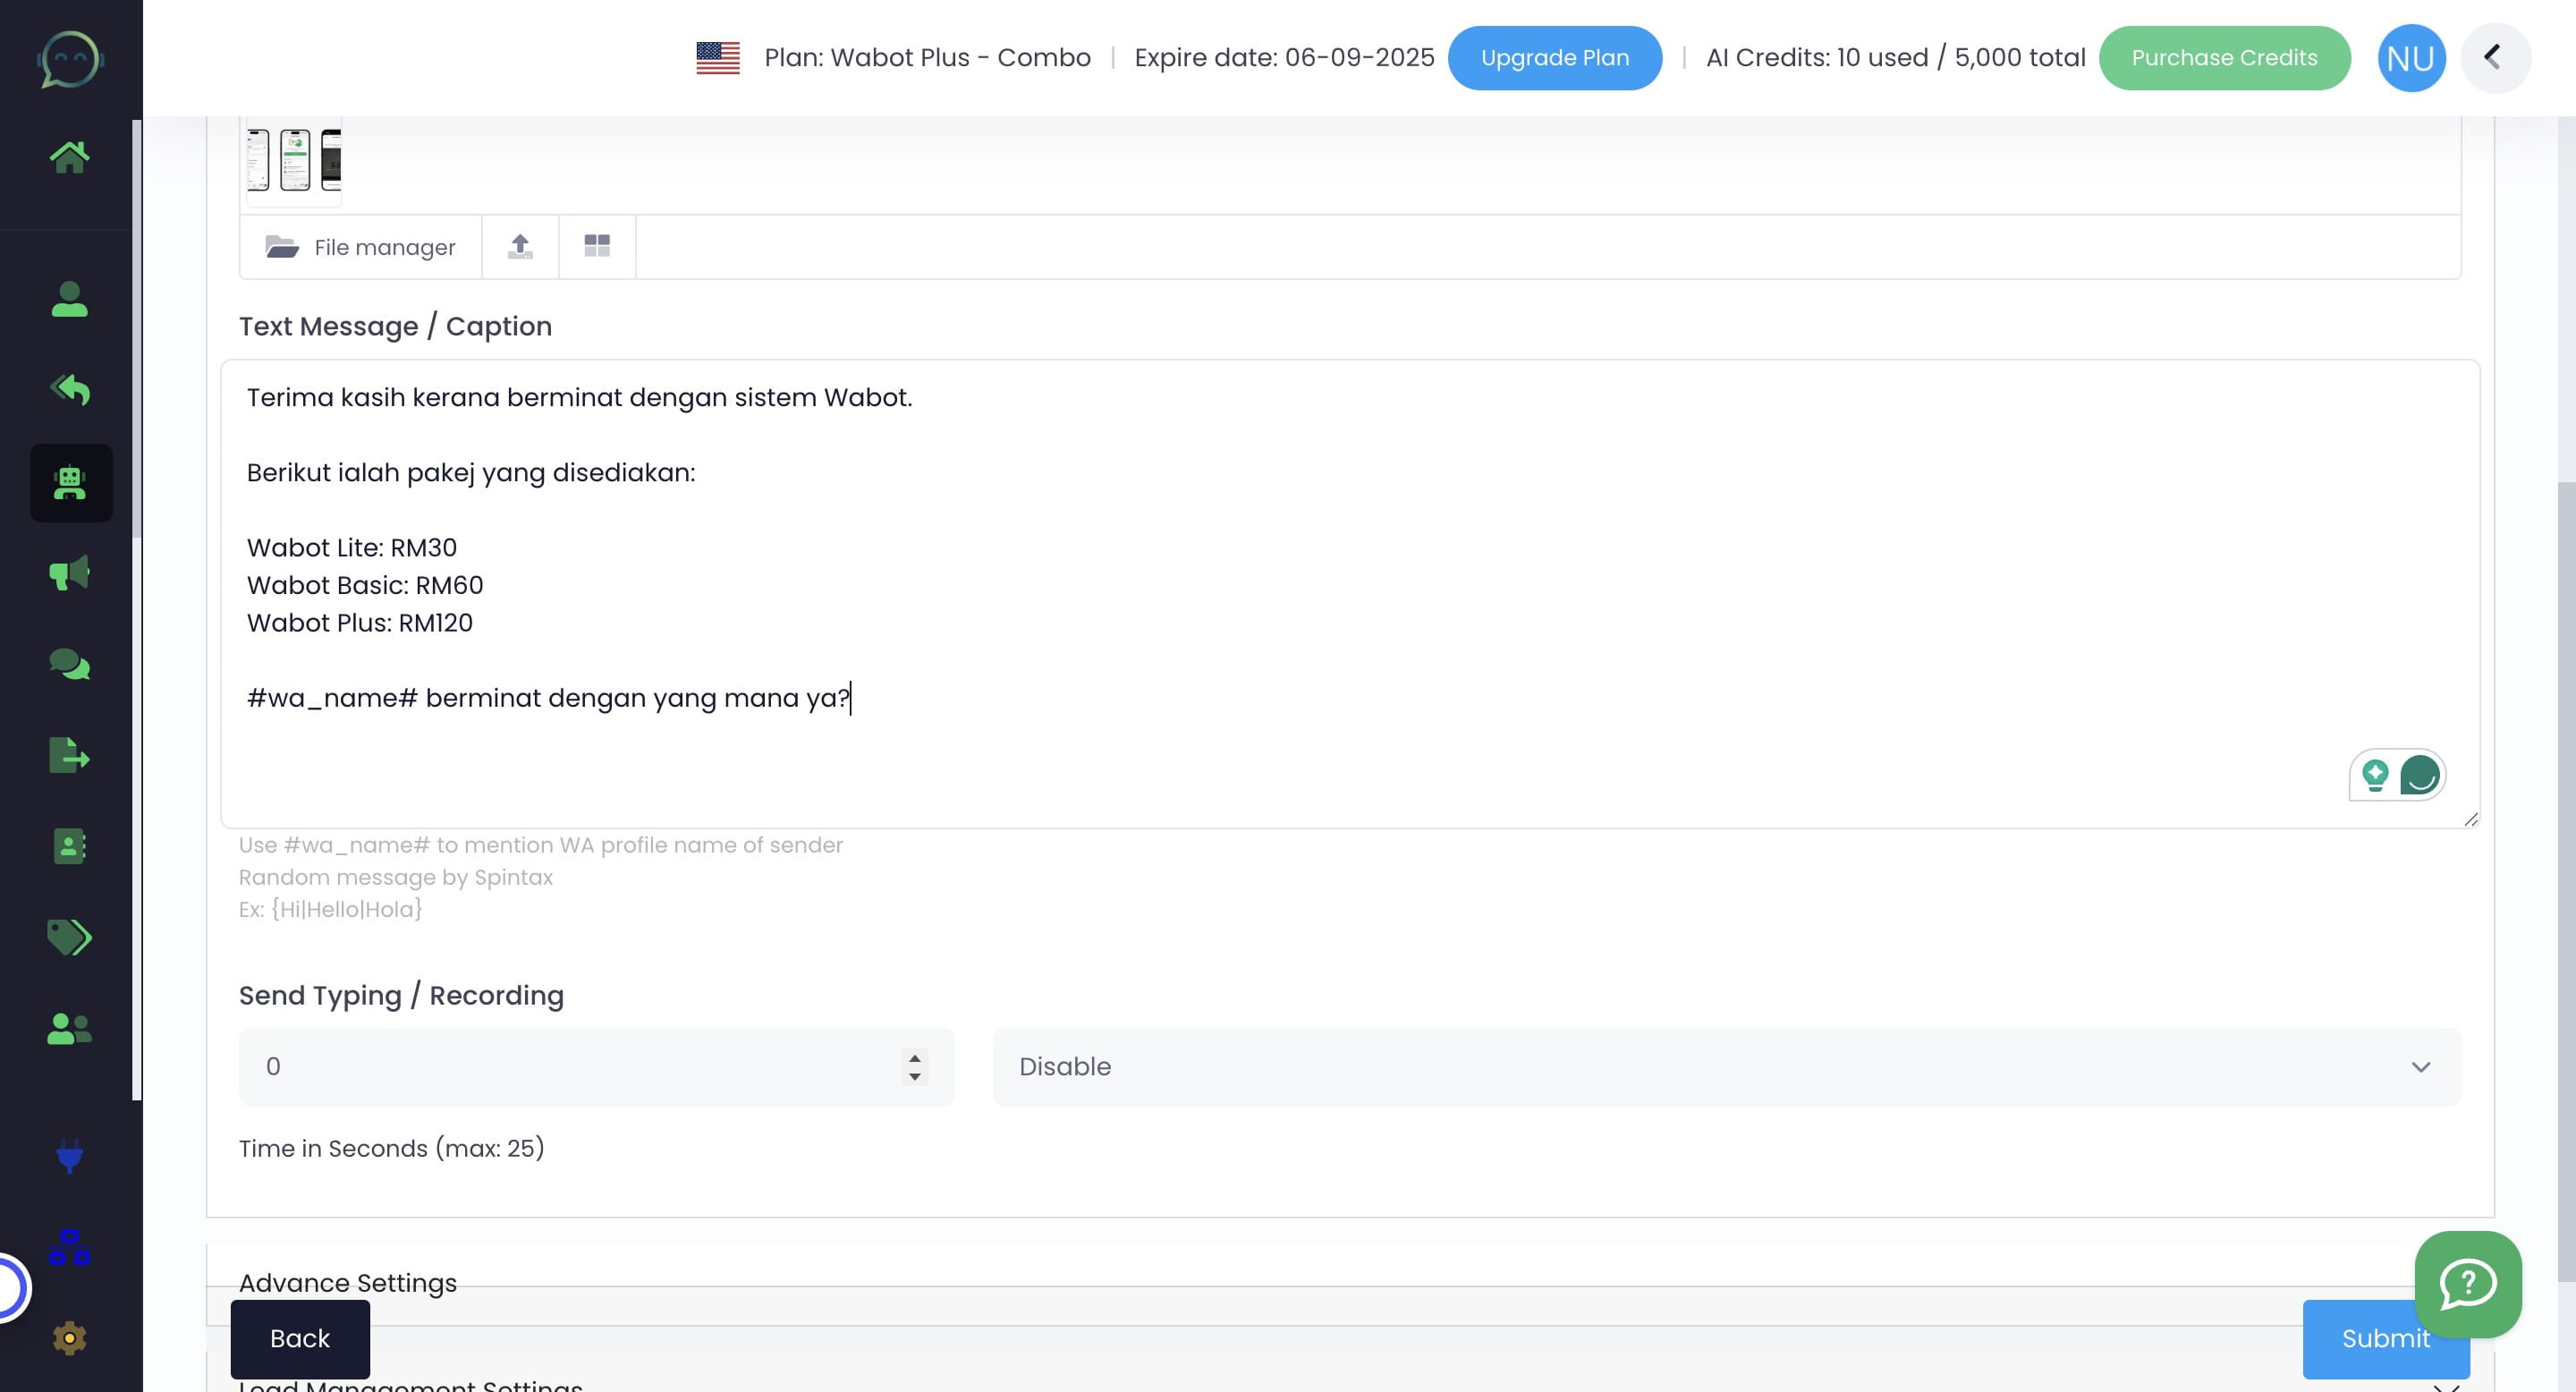
You can mention the receiver's name by putting #wa_name# in your script
To make it more human-like, you can choose to show the chatbot typing or recording before replying. If not, just put 0
Click on "Advance Settings"
Click "yes" if you want to activate Strict Sending Mode
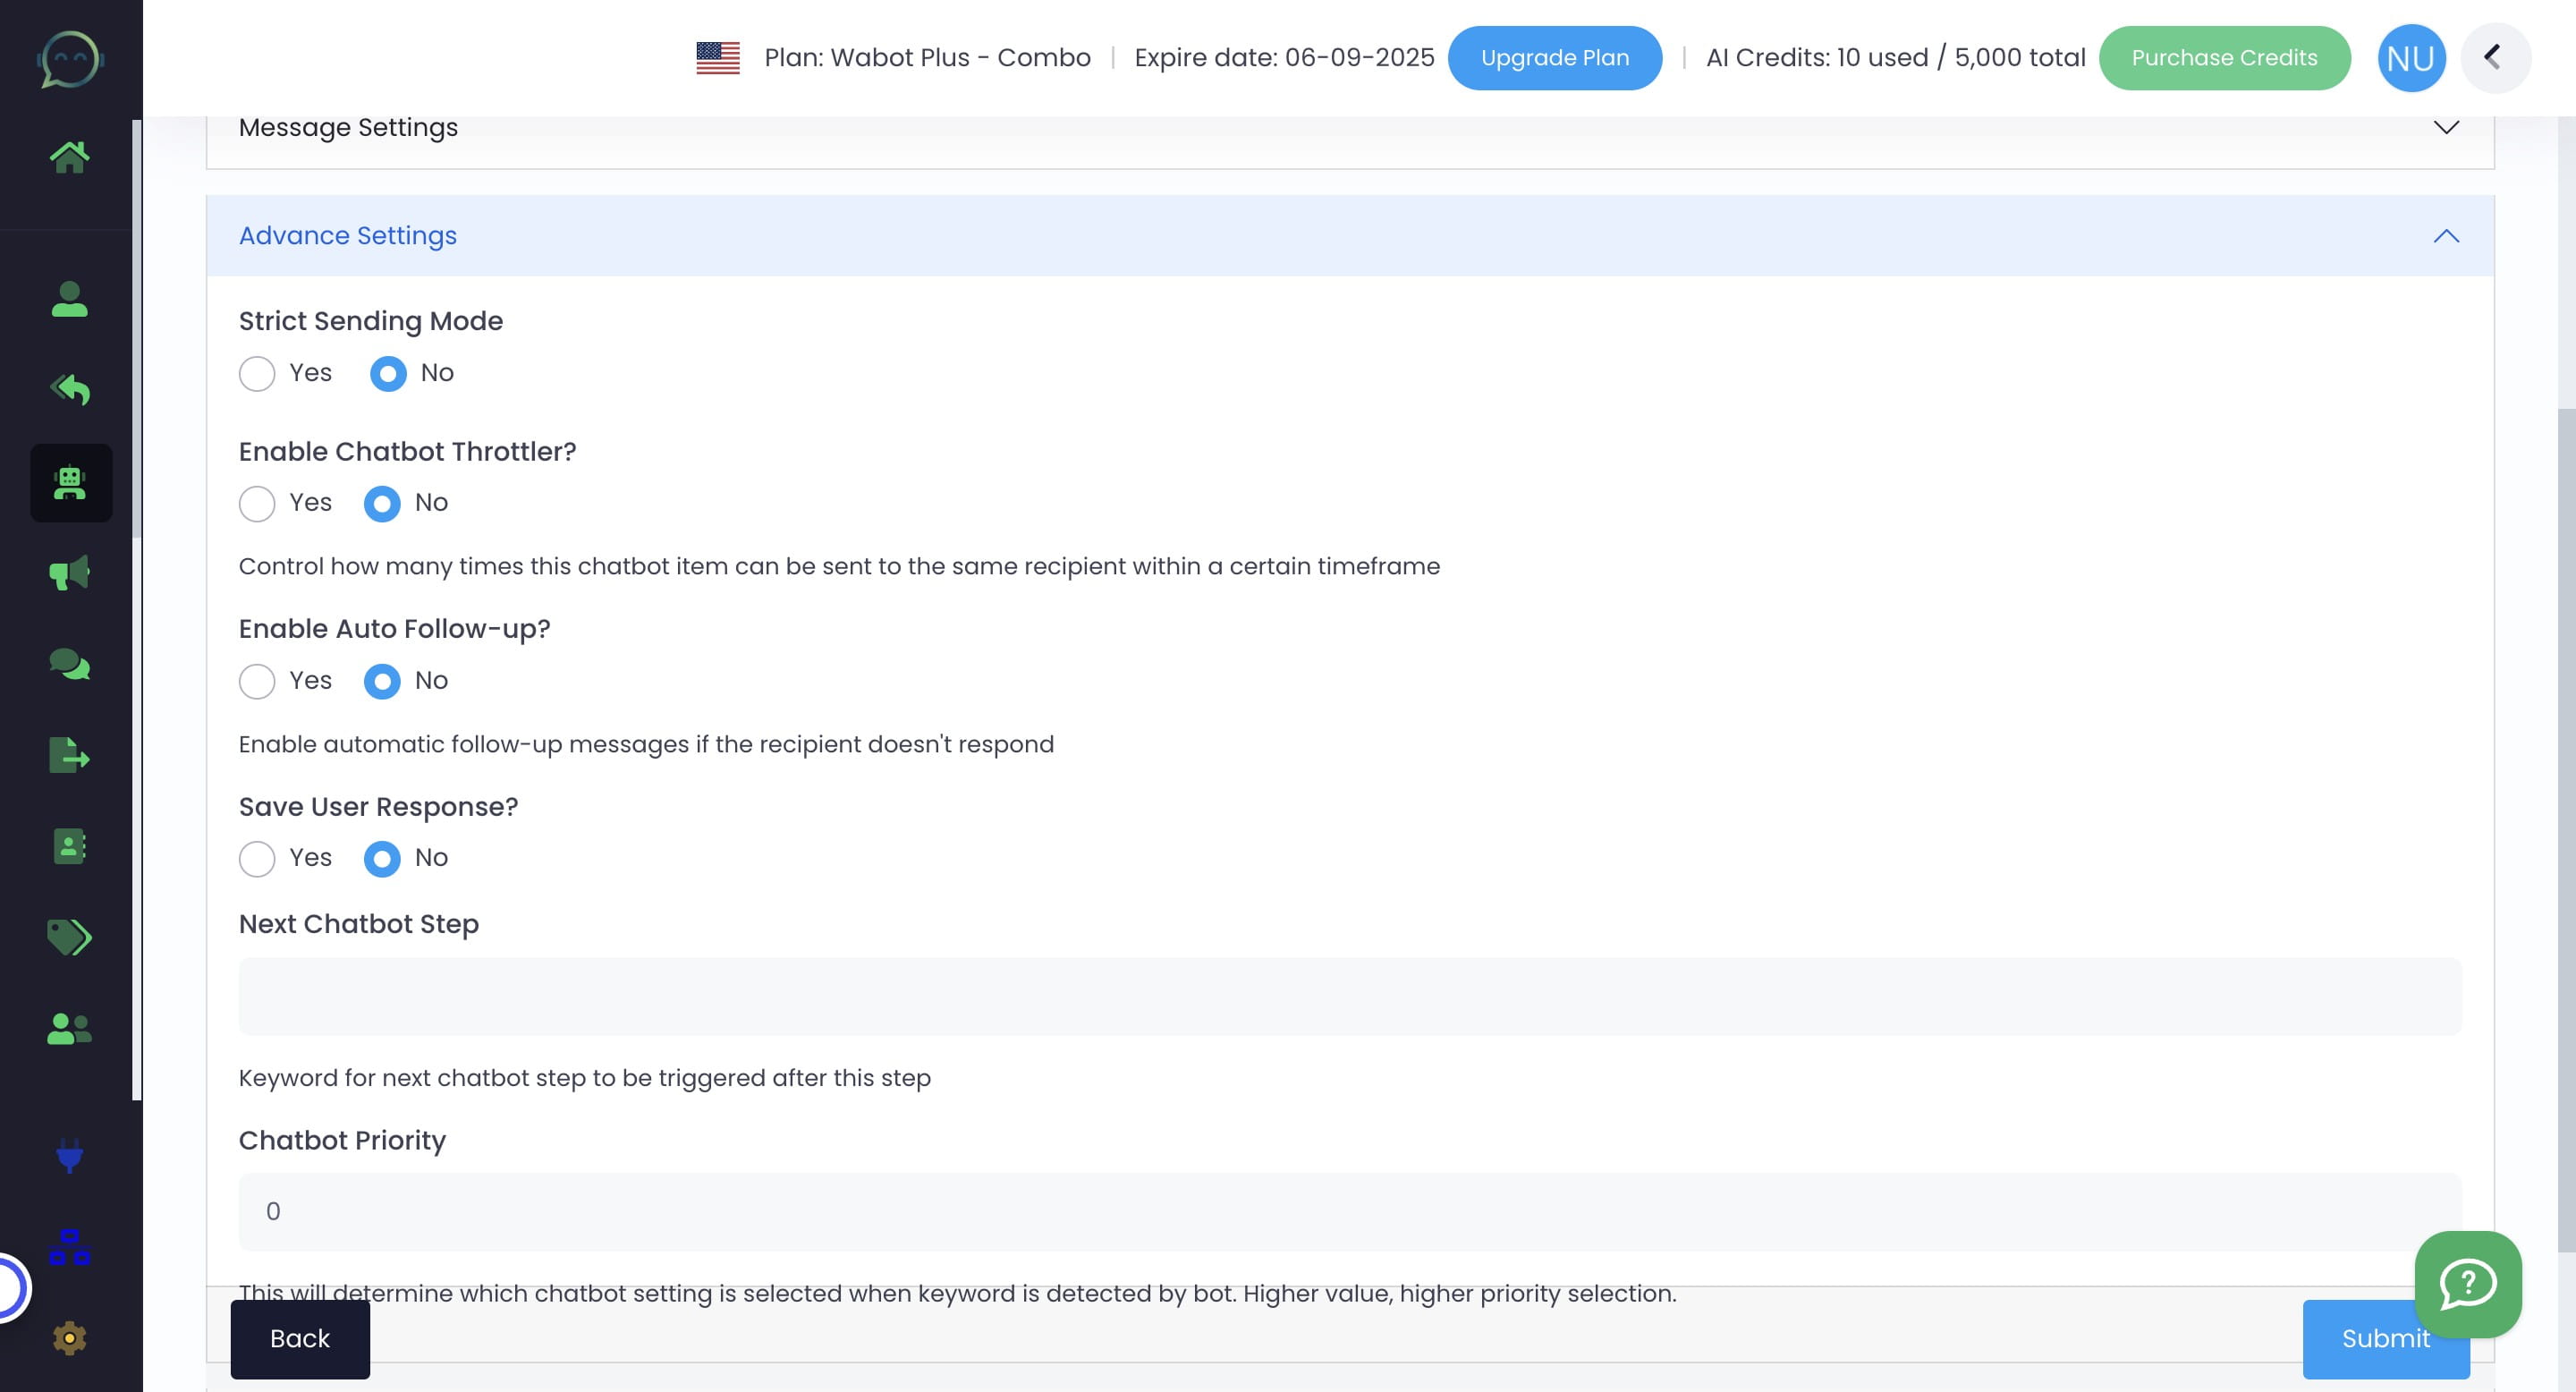
Strict Sending Mode
This is useful if you want to limit on who can receive or do not receive your chatbot reply
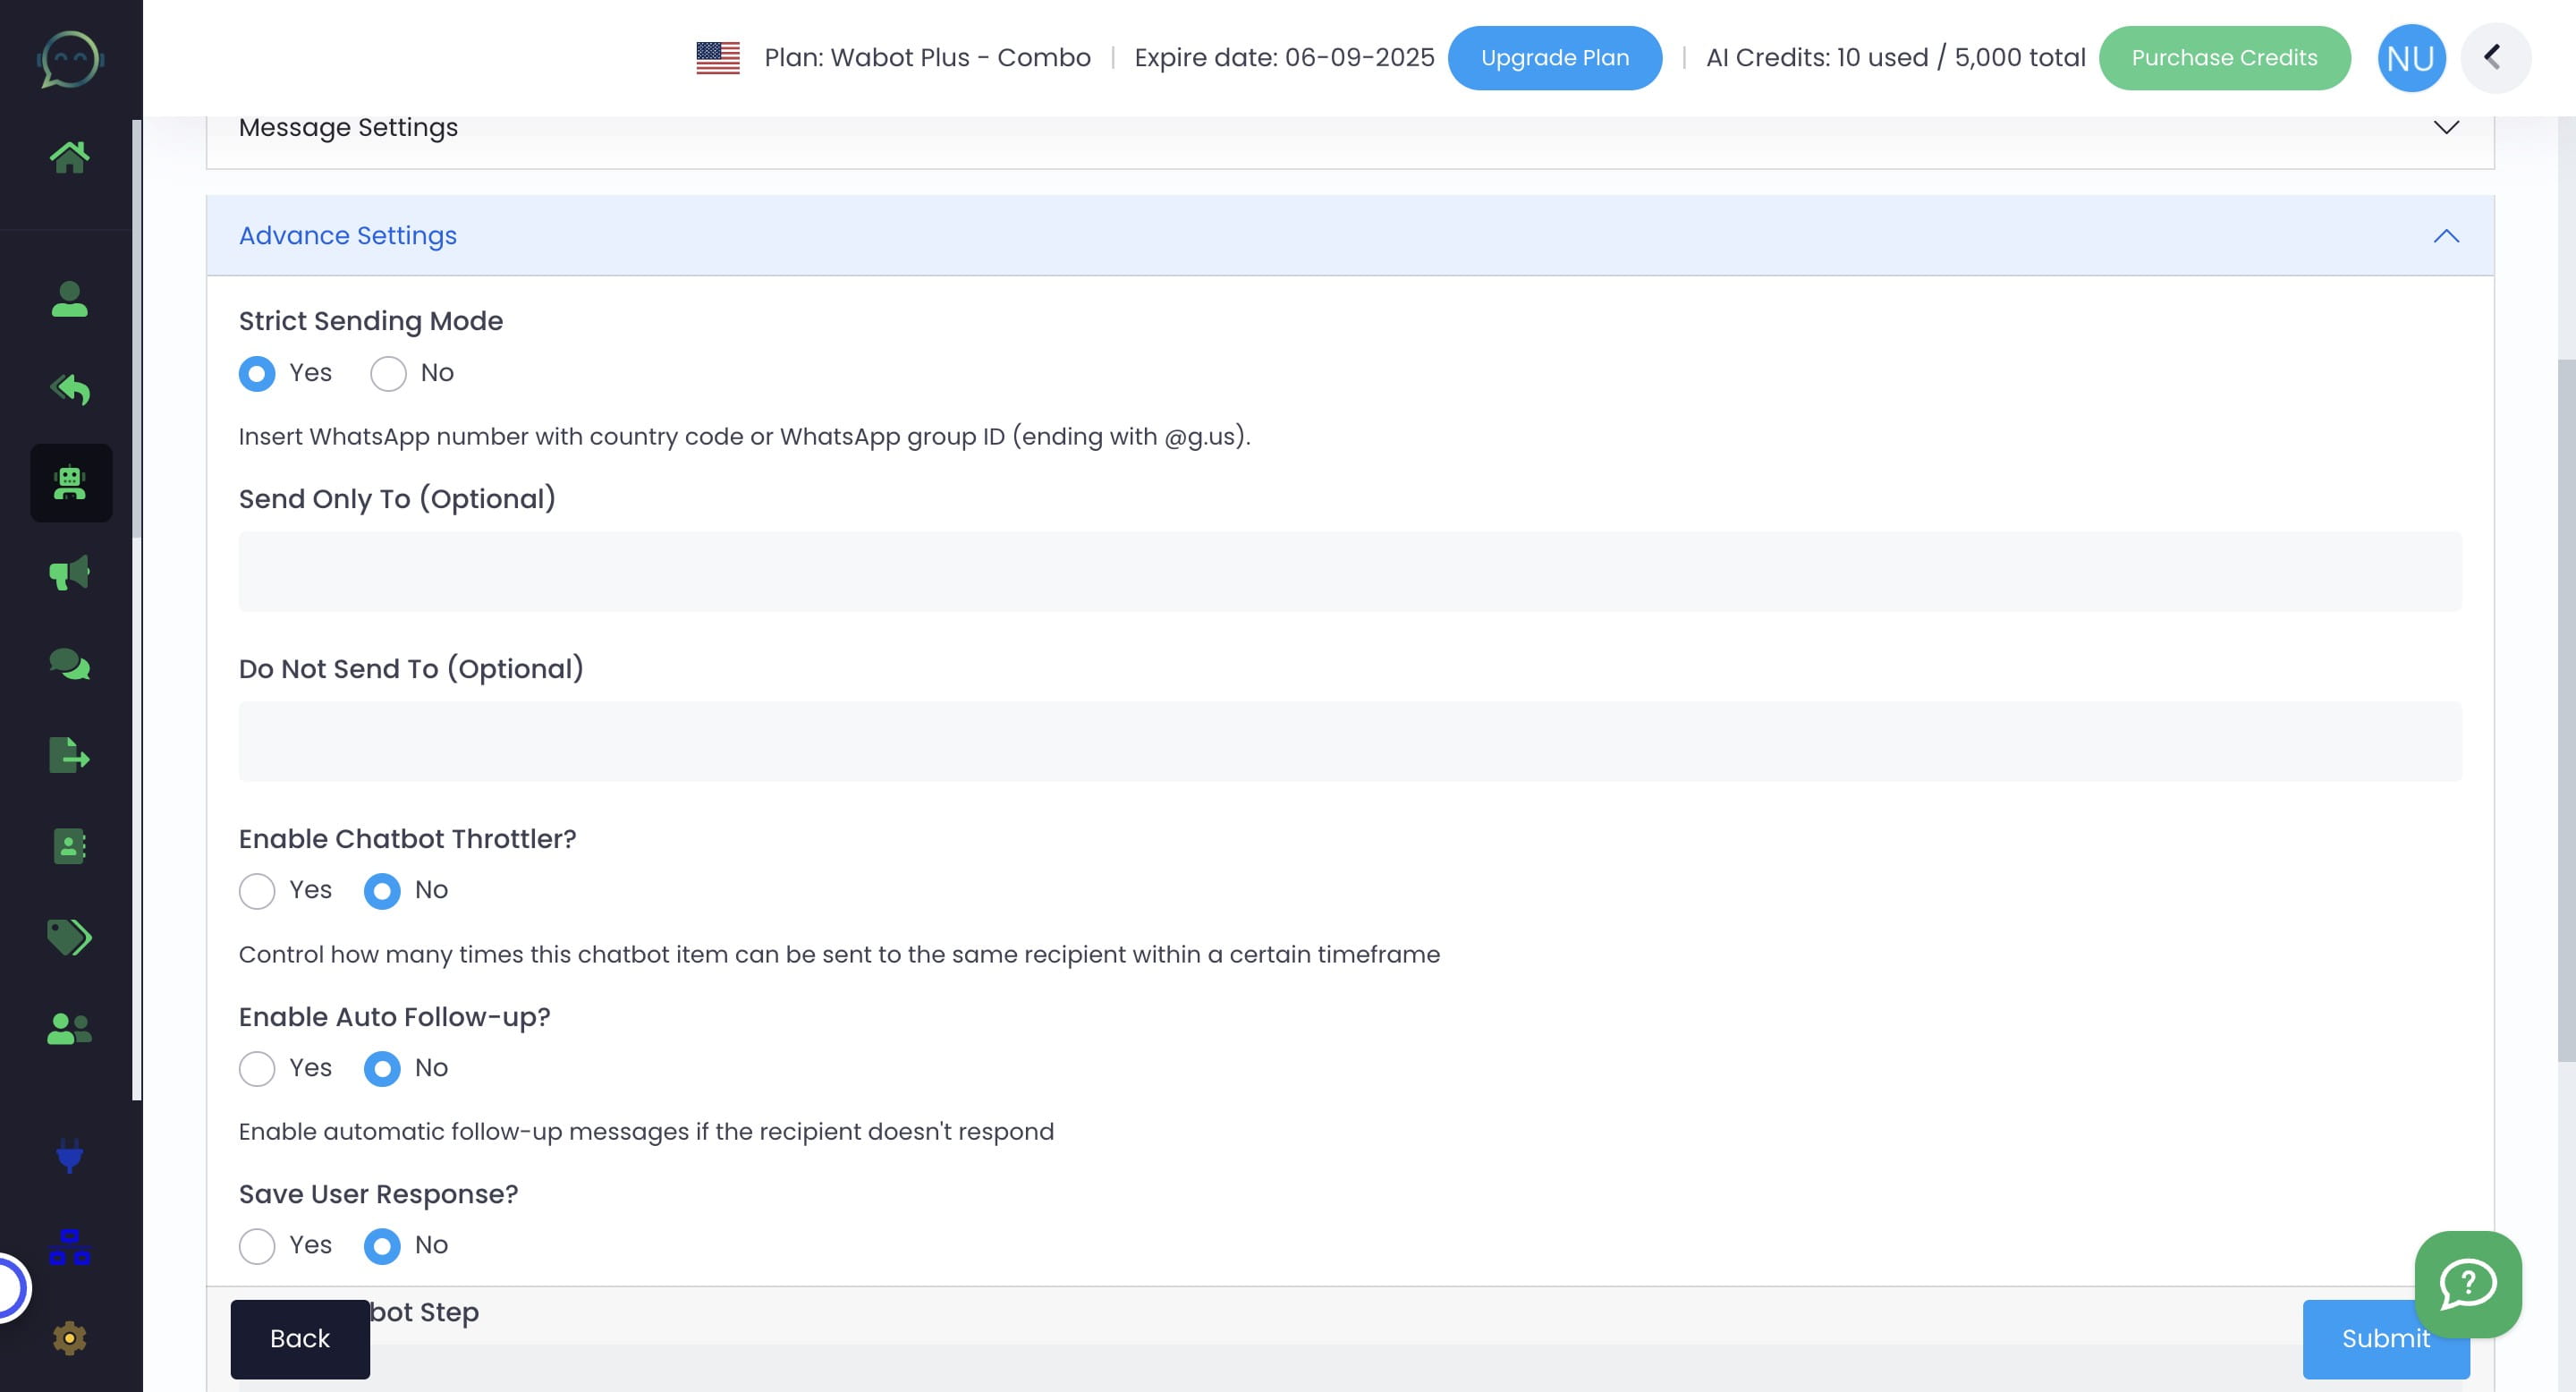
If you're simply checking if your chatbot keyword is functioning, you can restrict the chatbot's response by entering the WhatsApp number in the "Send Only To" section.
If your chatbot is already active and you prefer your colleagues not to receive responses from it, add their numbers to the "Do Not Send To" section.
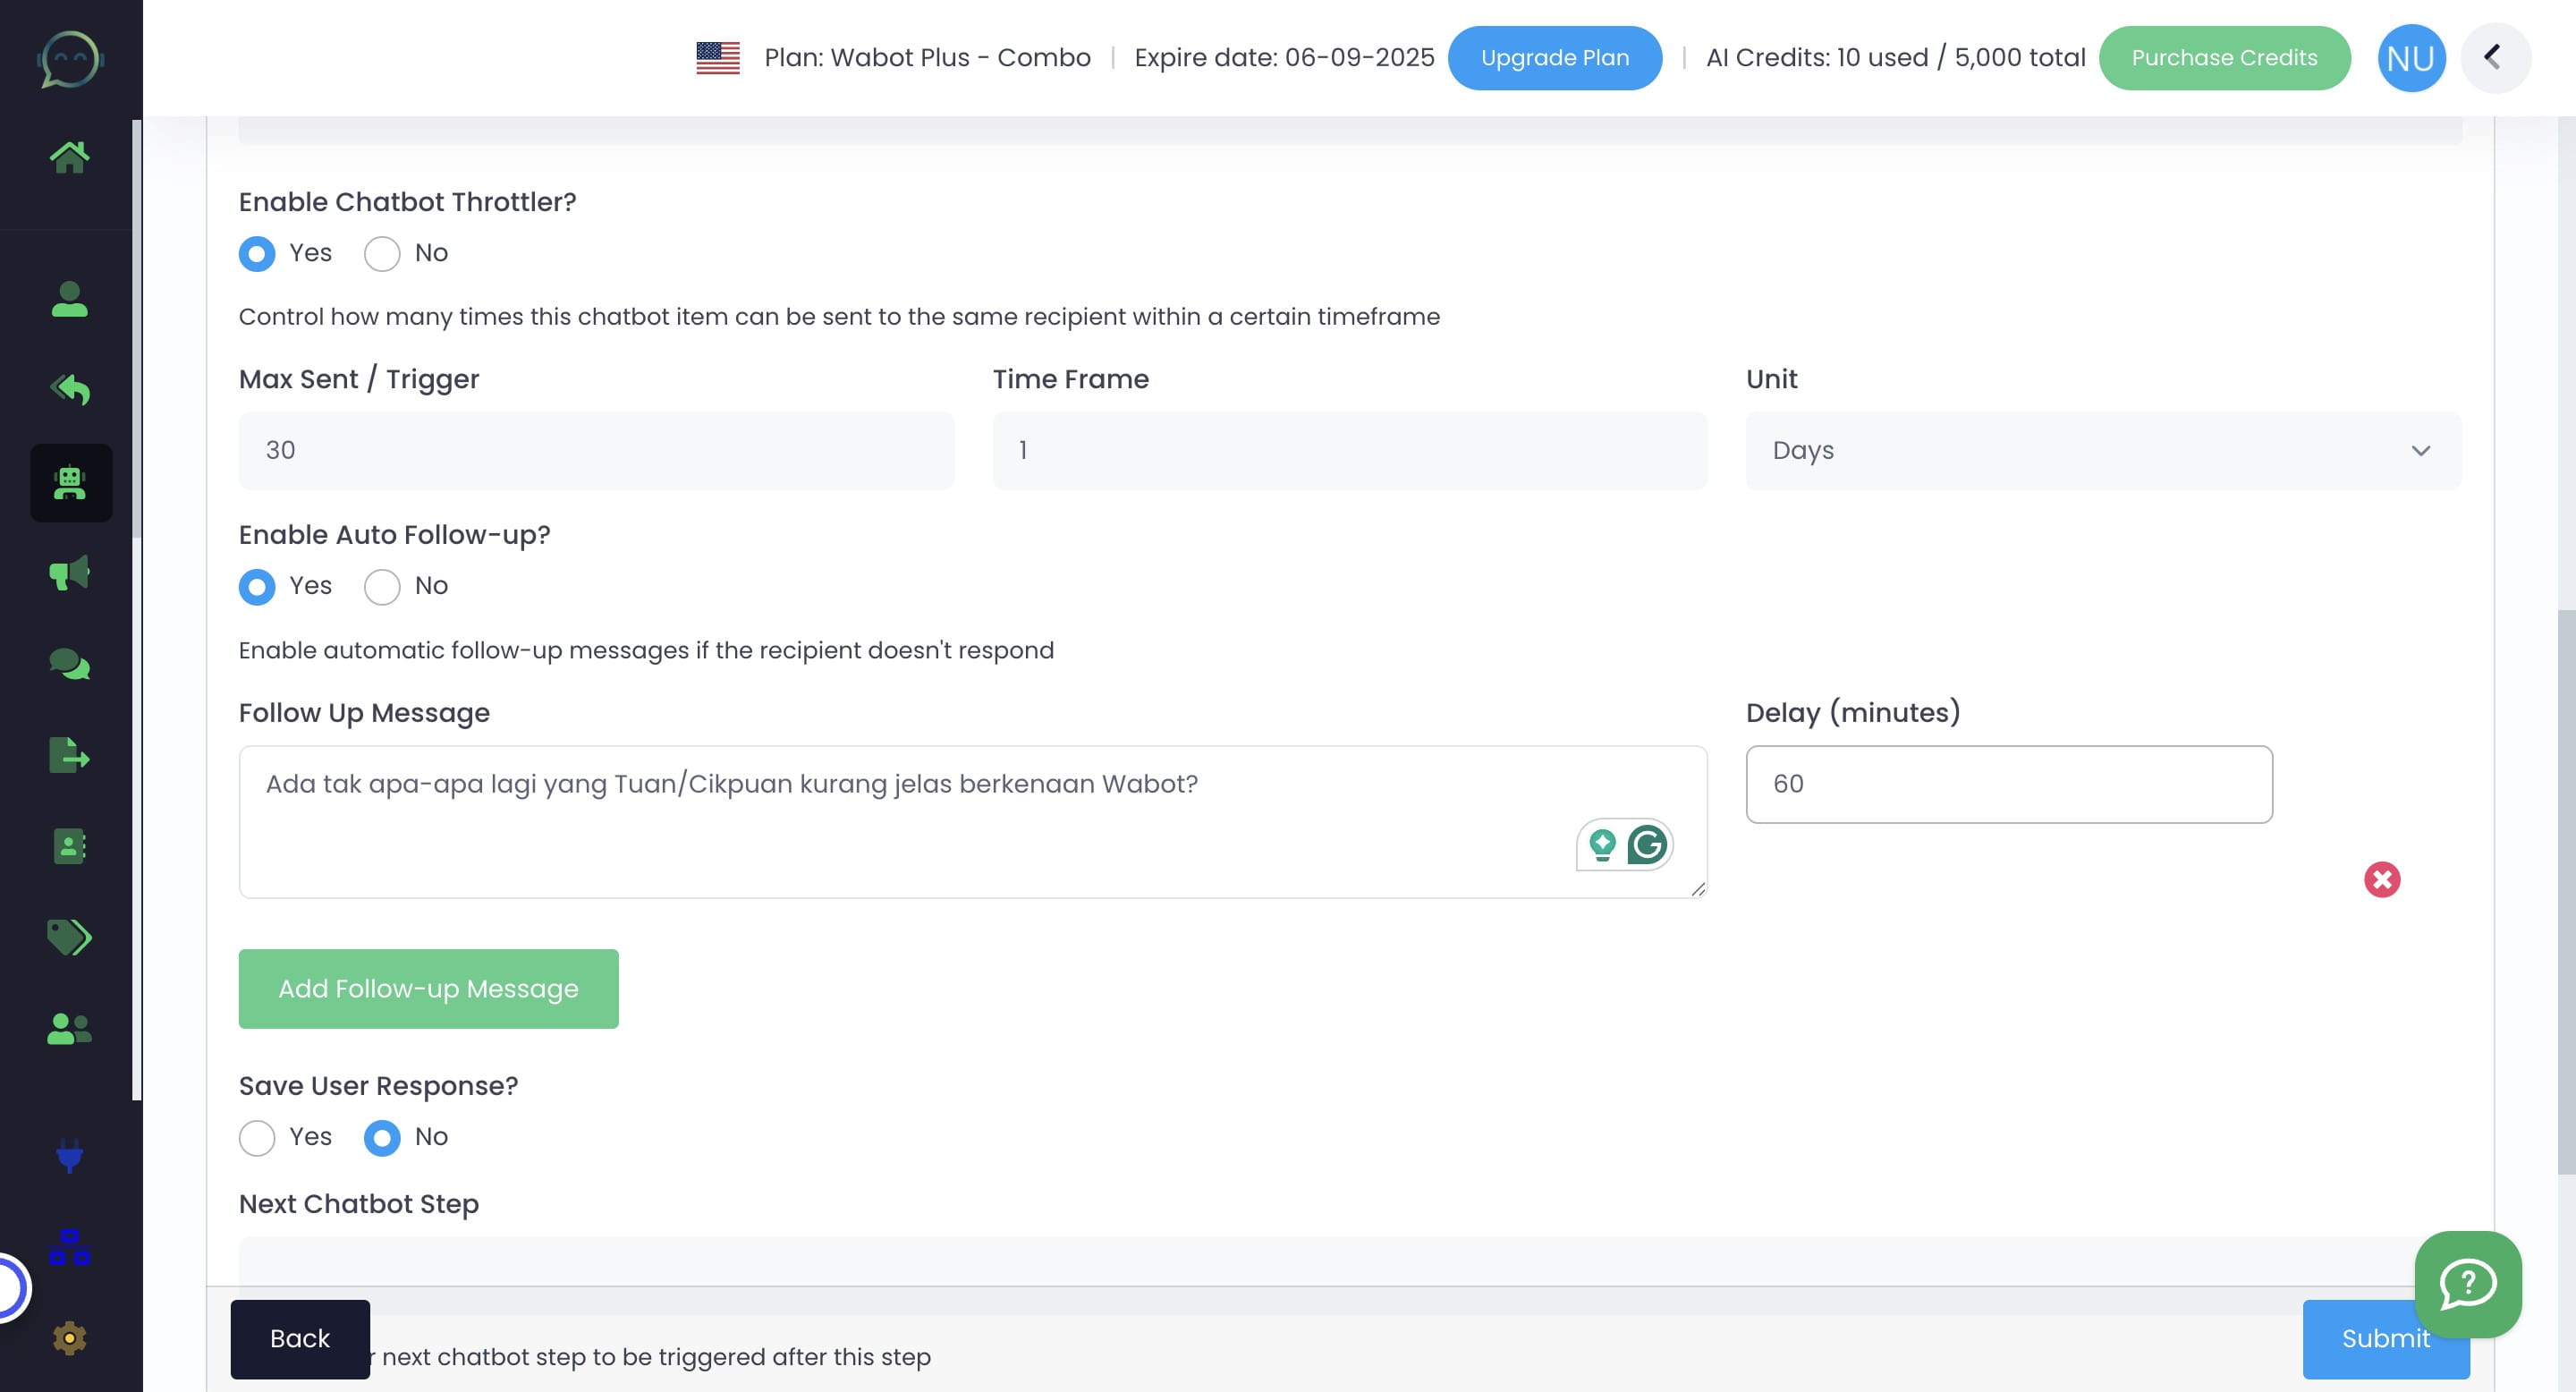
Chatbot Throttler
Enable "Chatbot Throttler" to control response frequency or choose "No" to disable

Max Sent/ Trigger refers to how many messages the customer can send until the chatbot stop replying. Example here: After 30 messages being sent out within the time frame of 1 day, the chatbot will stop working as it has reached the limit
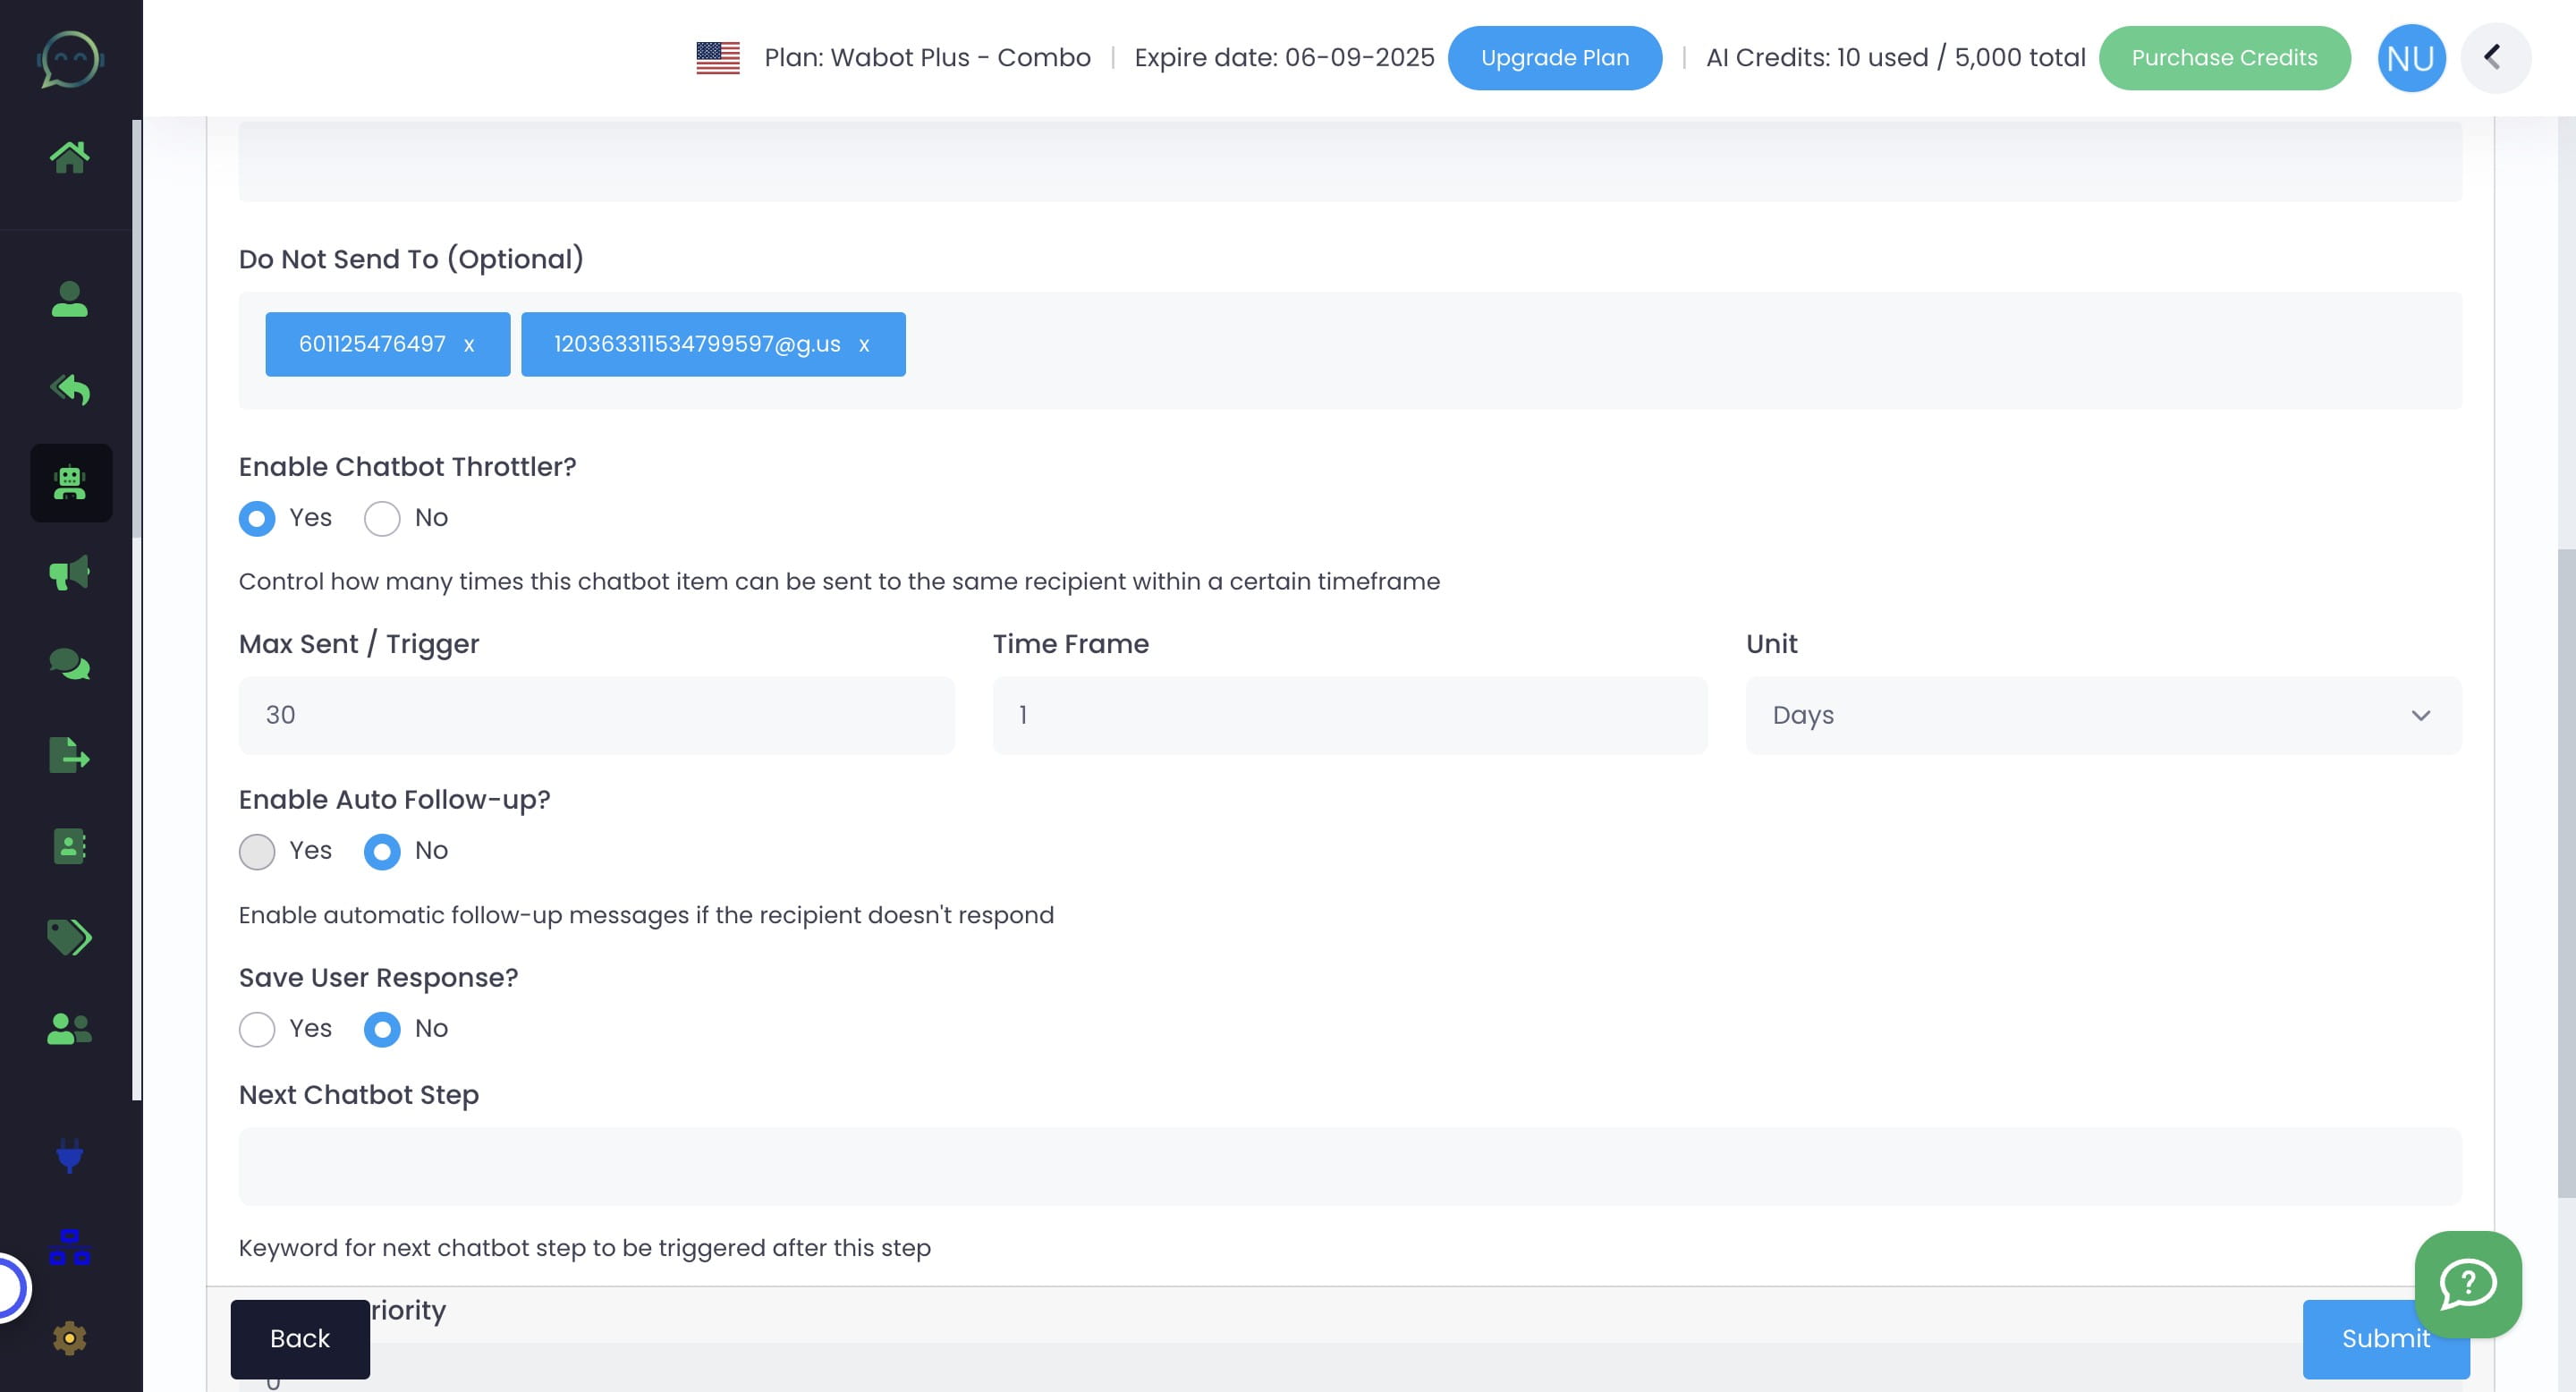
If you want the chatbot to keep replying, simply choose "No" to disable the chatbot throttler
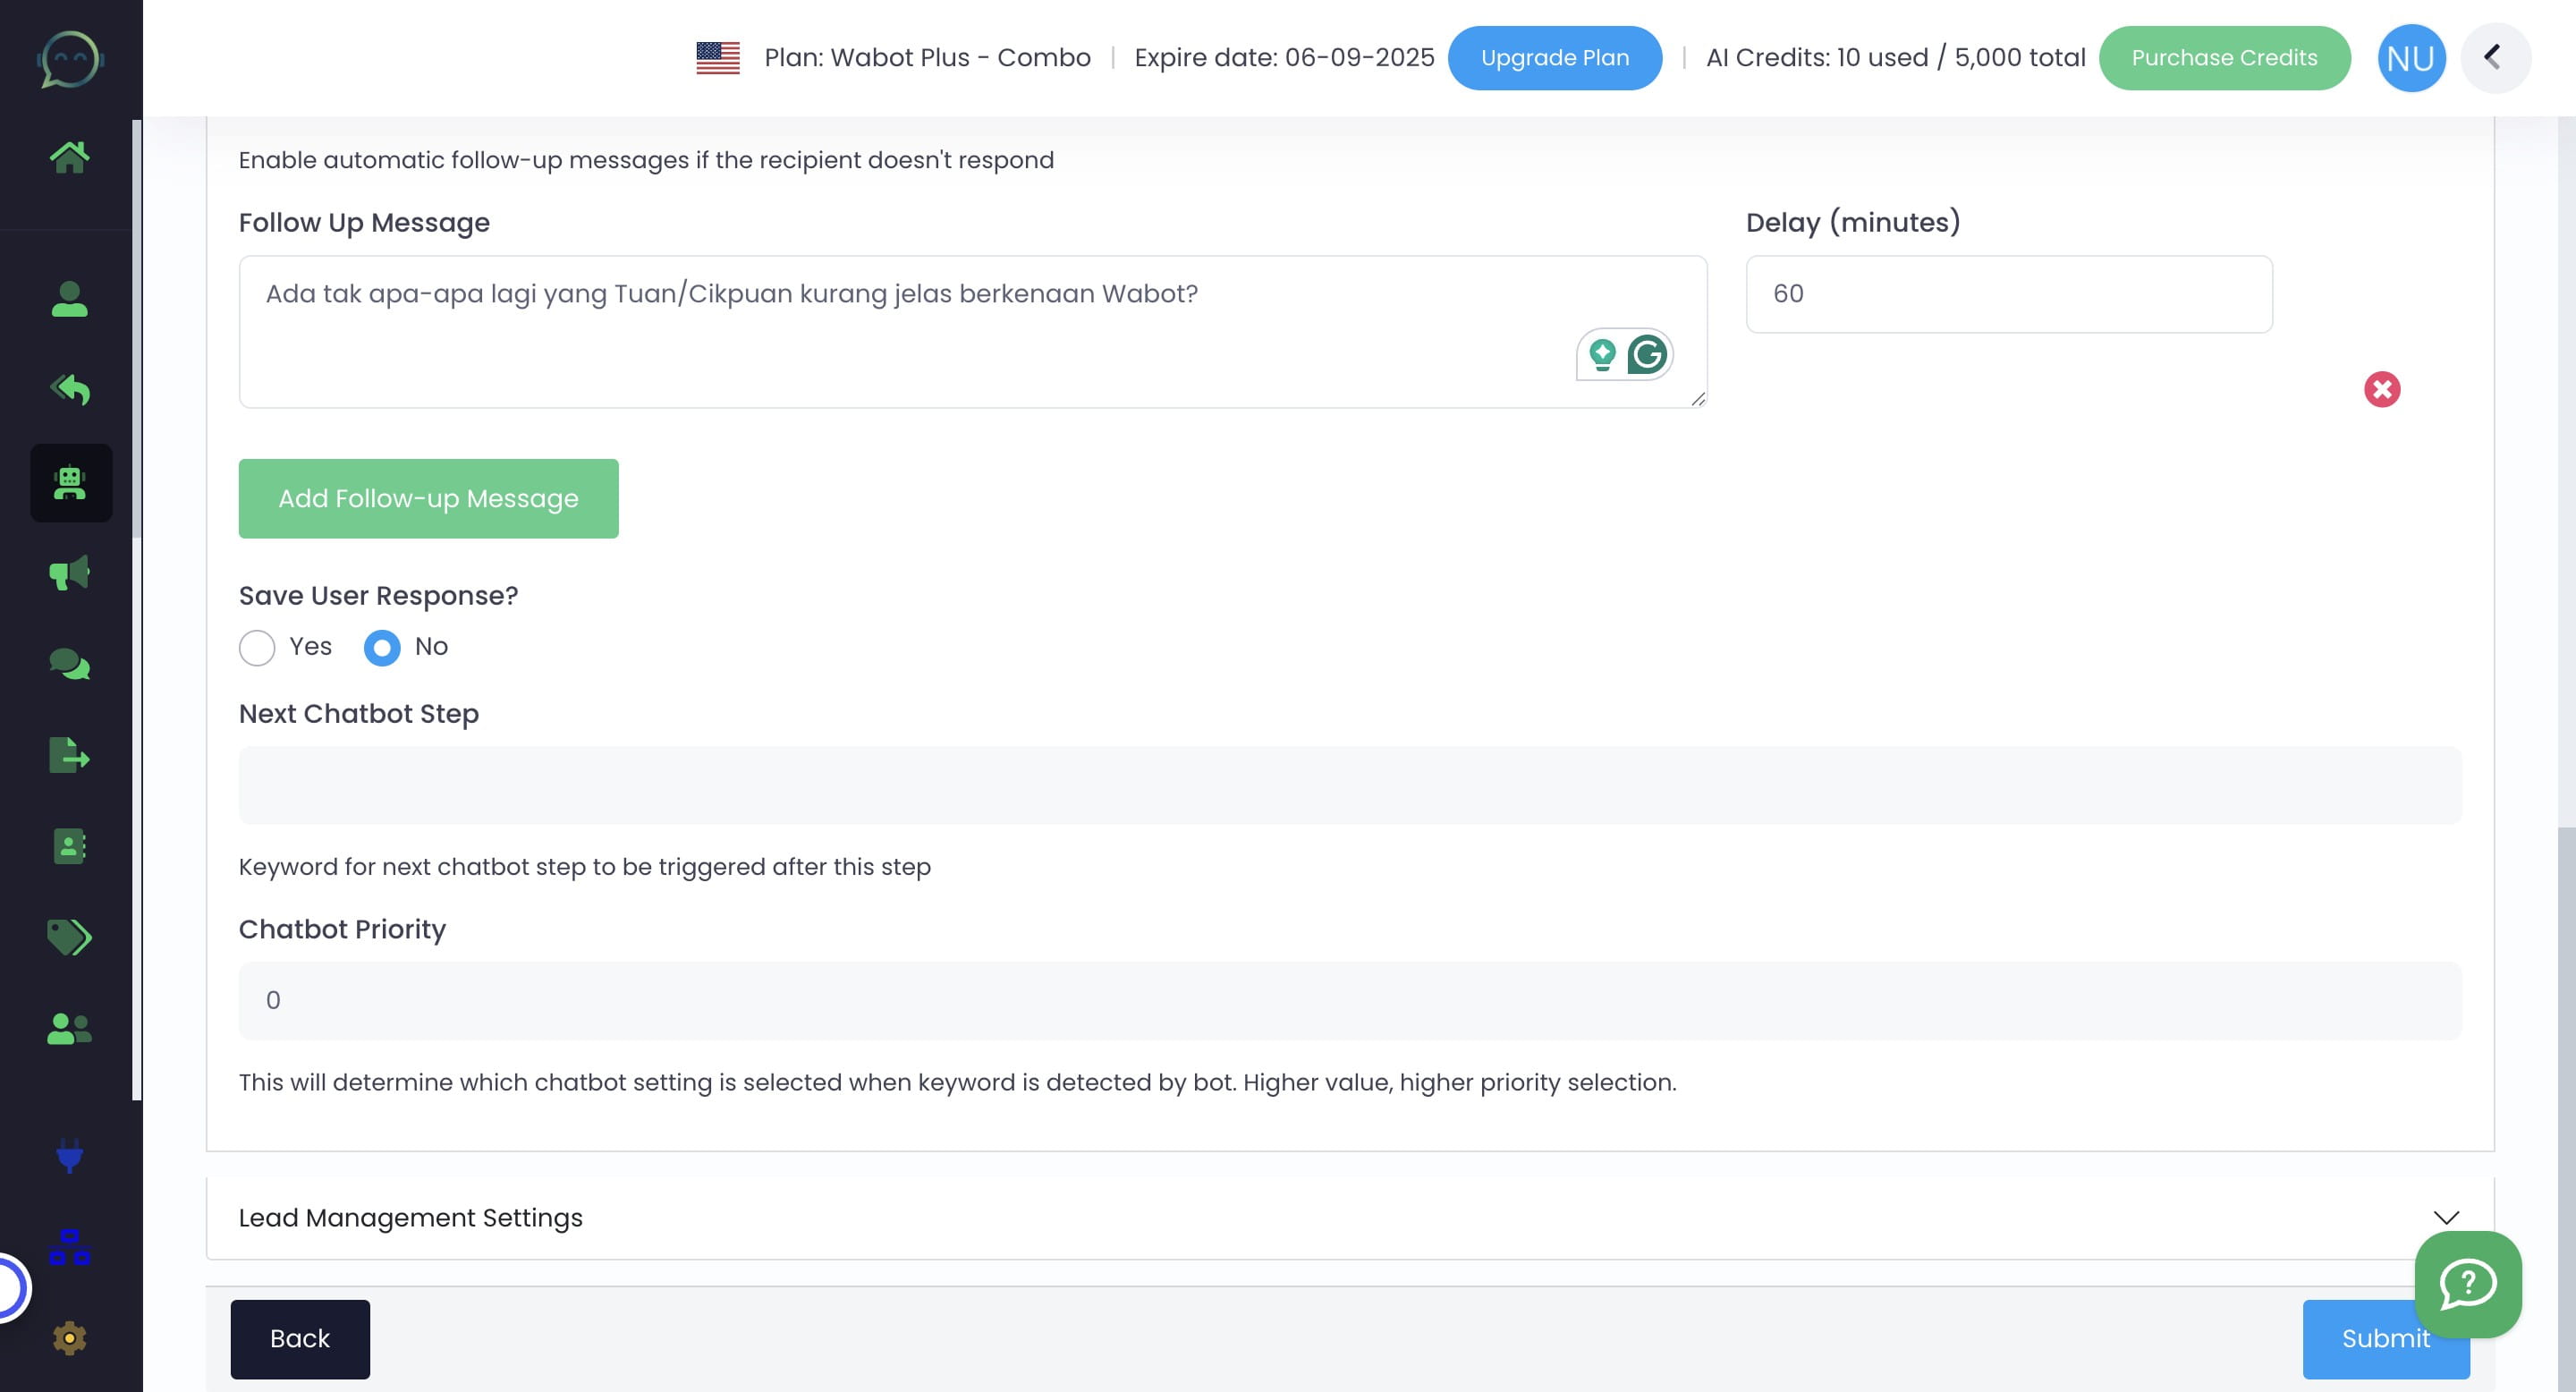
Follow-Up
You can now do a quick and simple follow-up. Insert the common follow-up messages to encourage the customer to reply

Set the "Delay (minutes)". This follow-up will be sent according to the delay after this chatbot keyword has been triggered
Click on "Lead Management Settings"
When you click on "Leads Management Settings", you will have the option to forward messages to your team, store data for automation, or organize contact groups
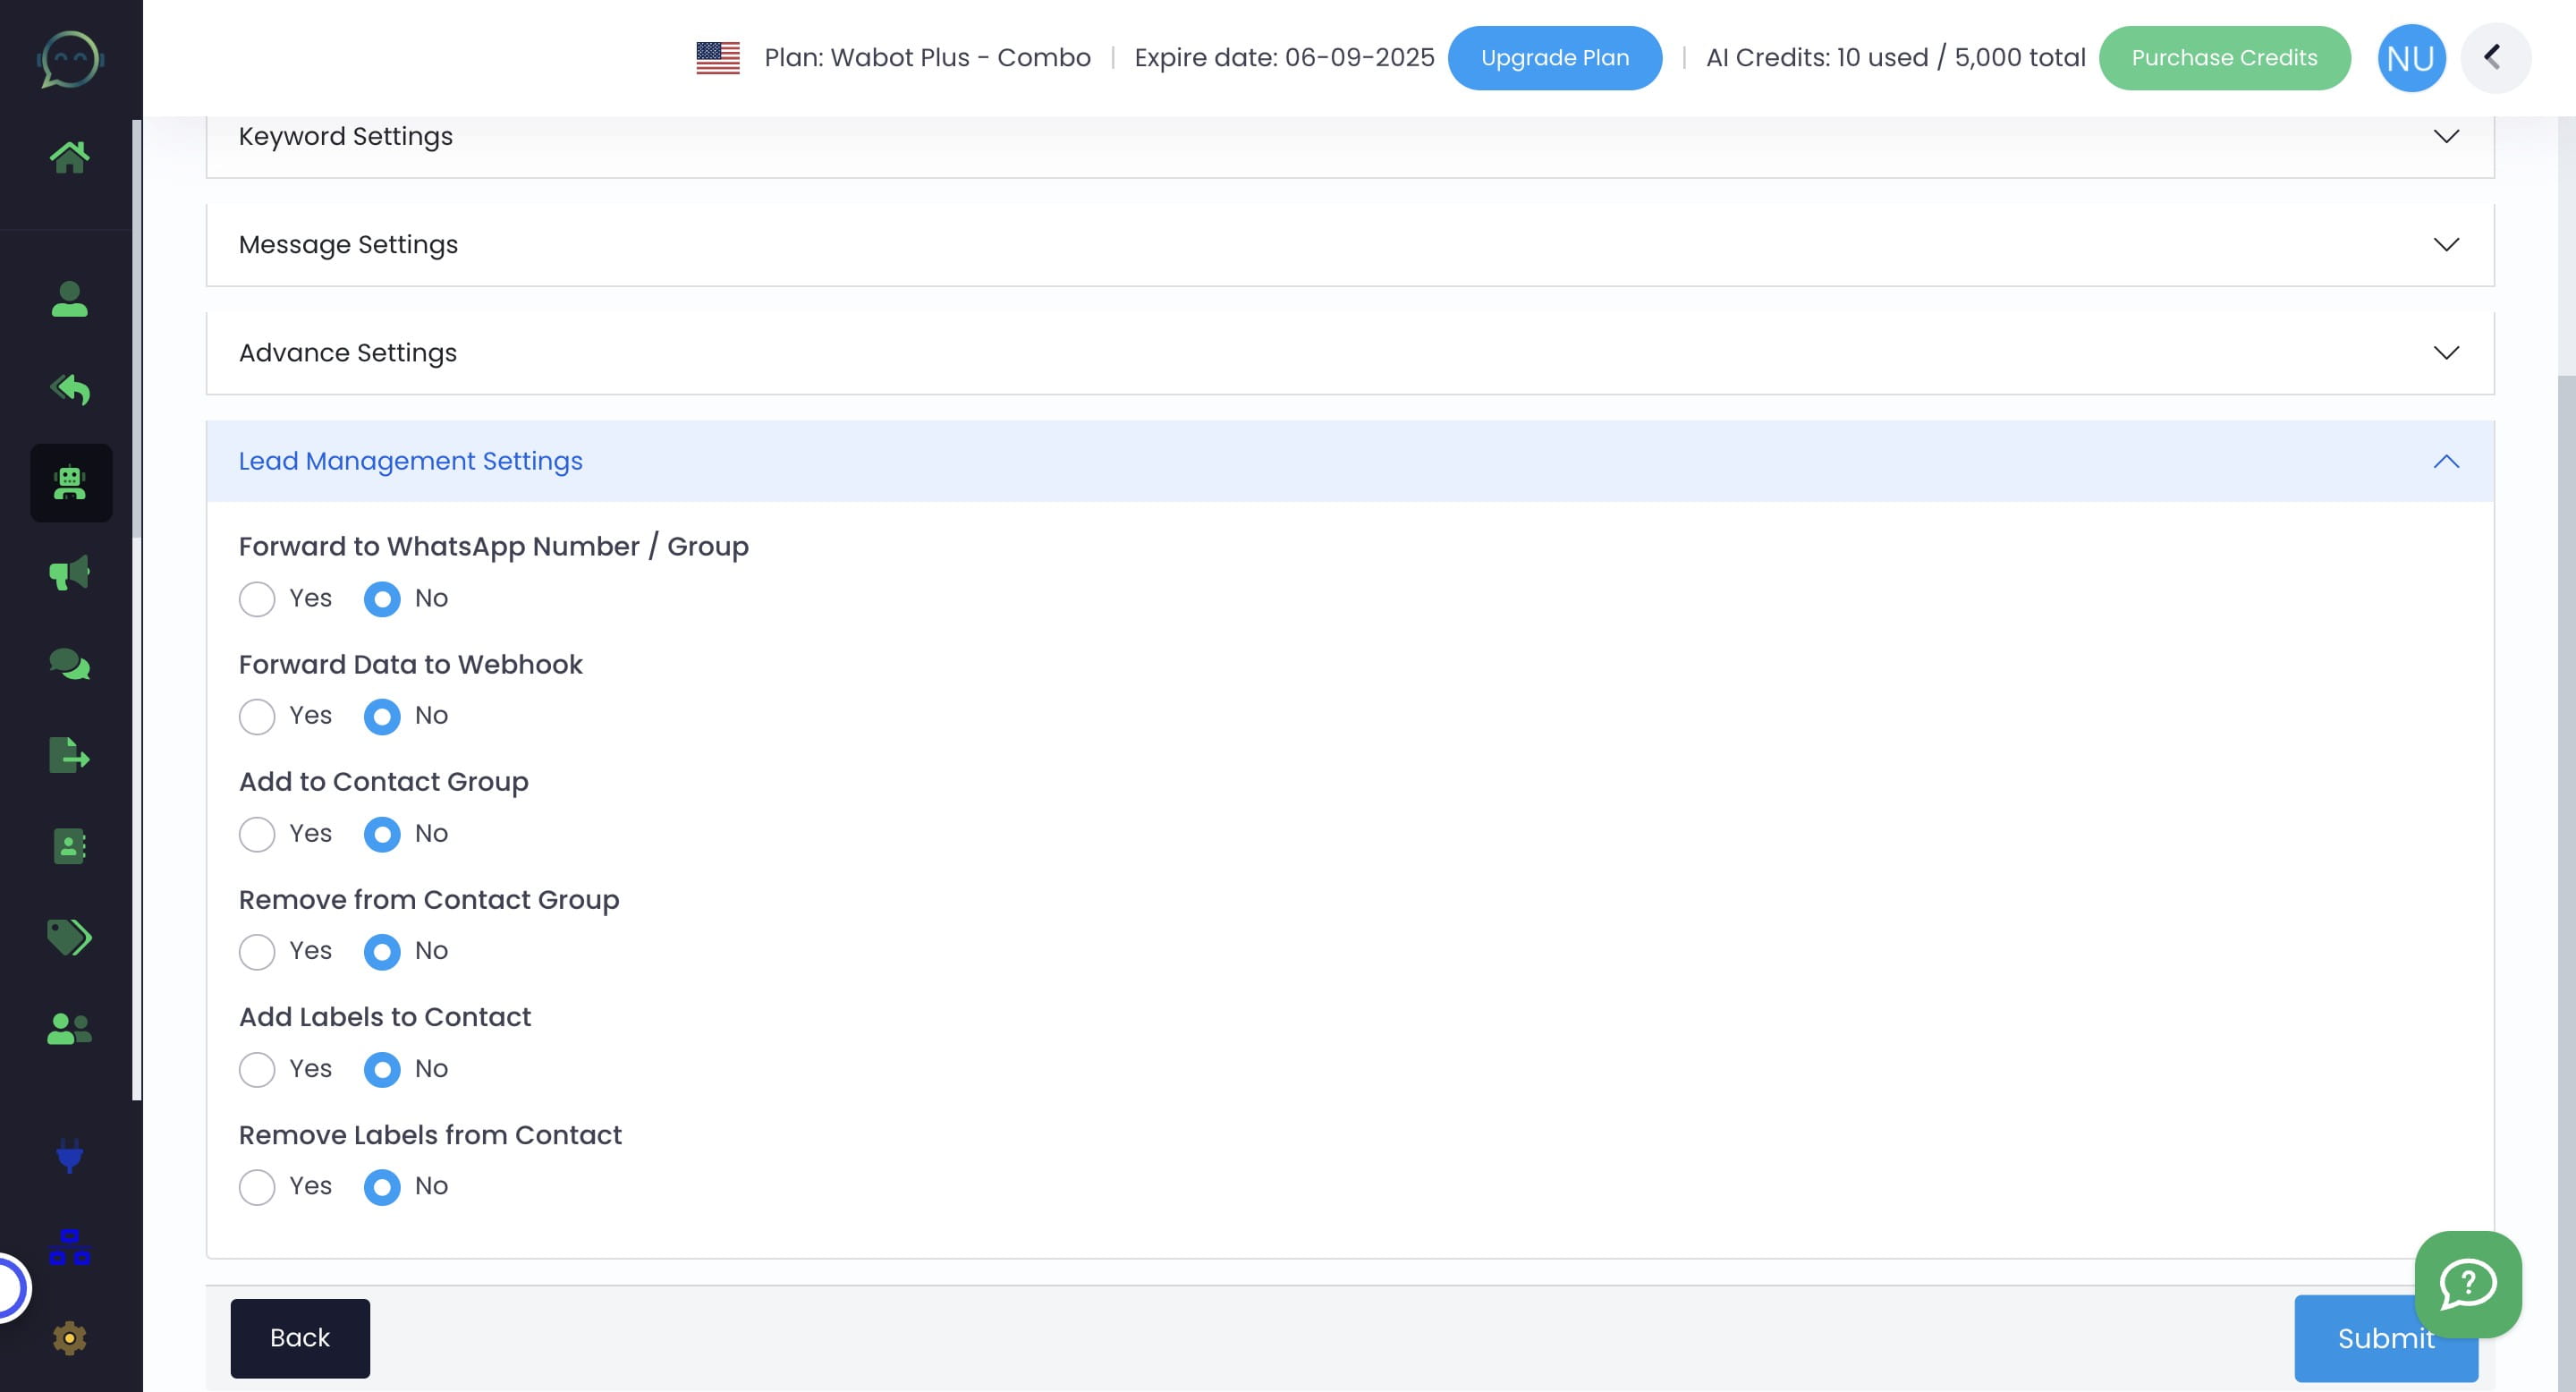
If you do not want to do any of the above, simply click "No" for every option
Click "Submit"
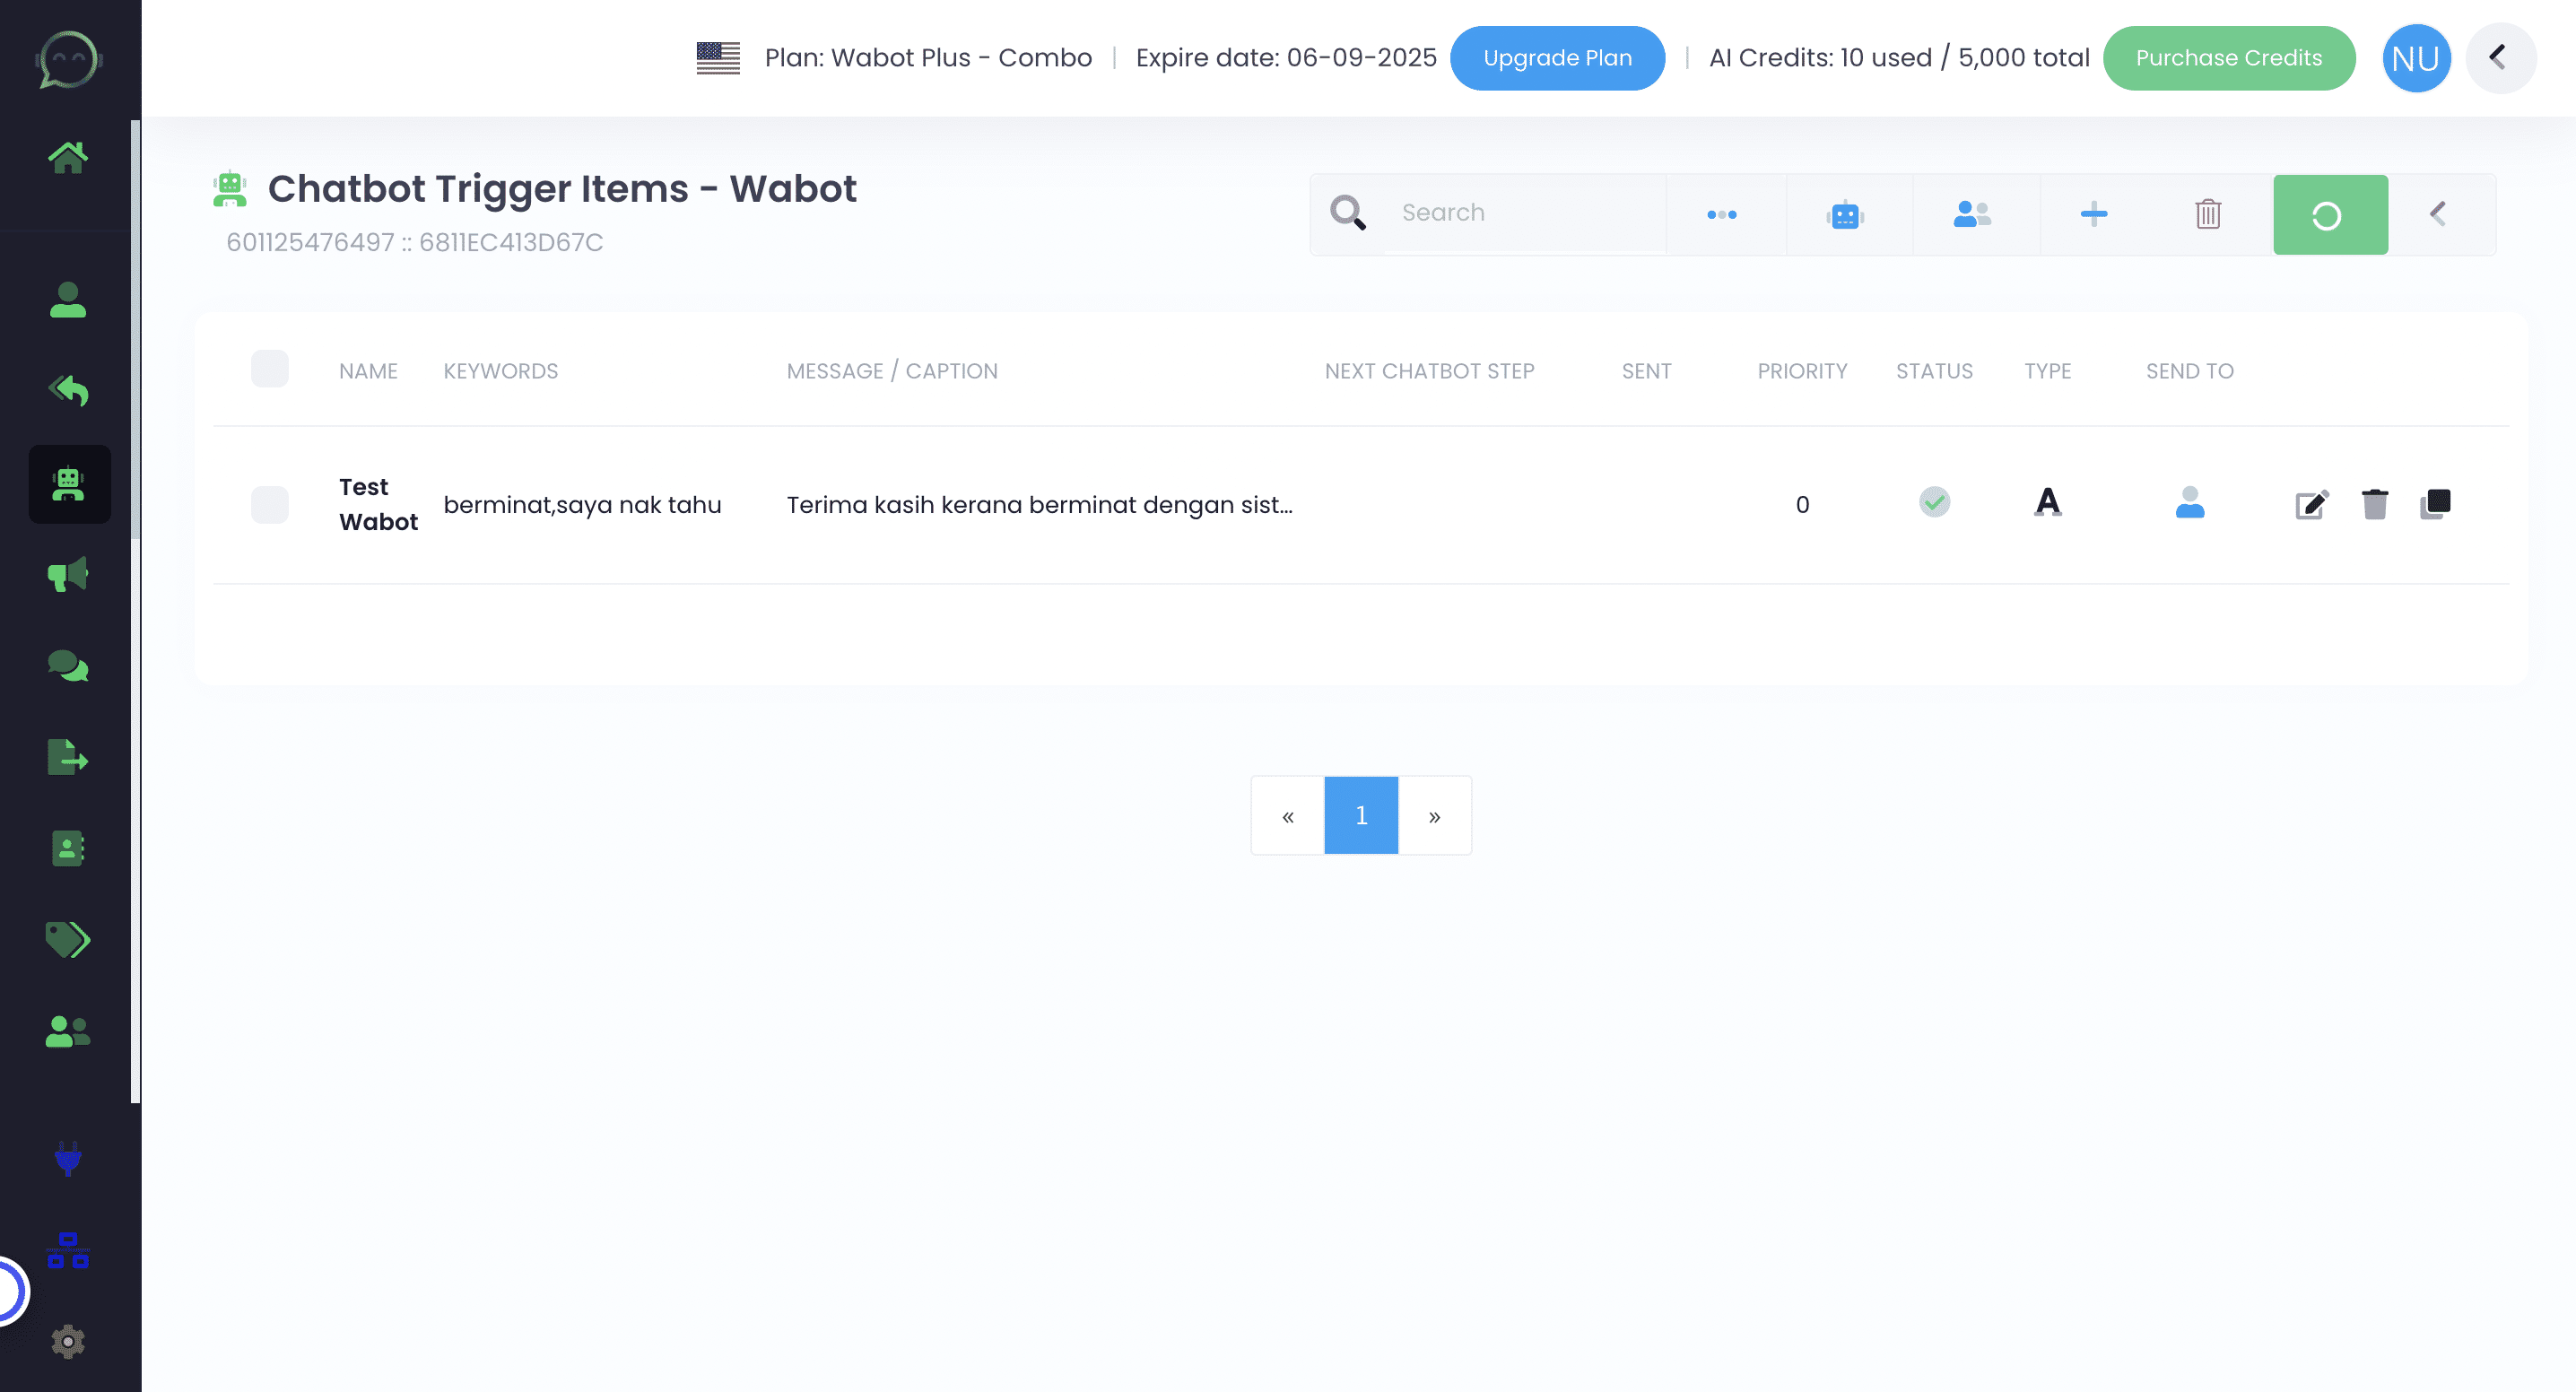
Click to run the chatbot
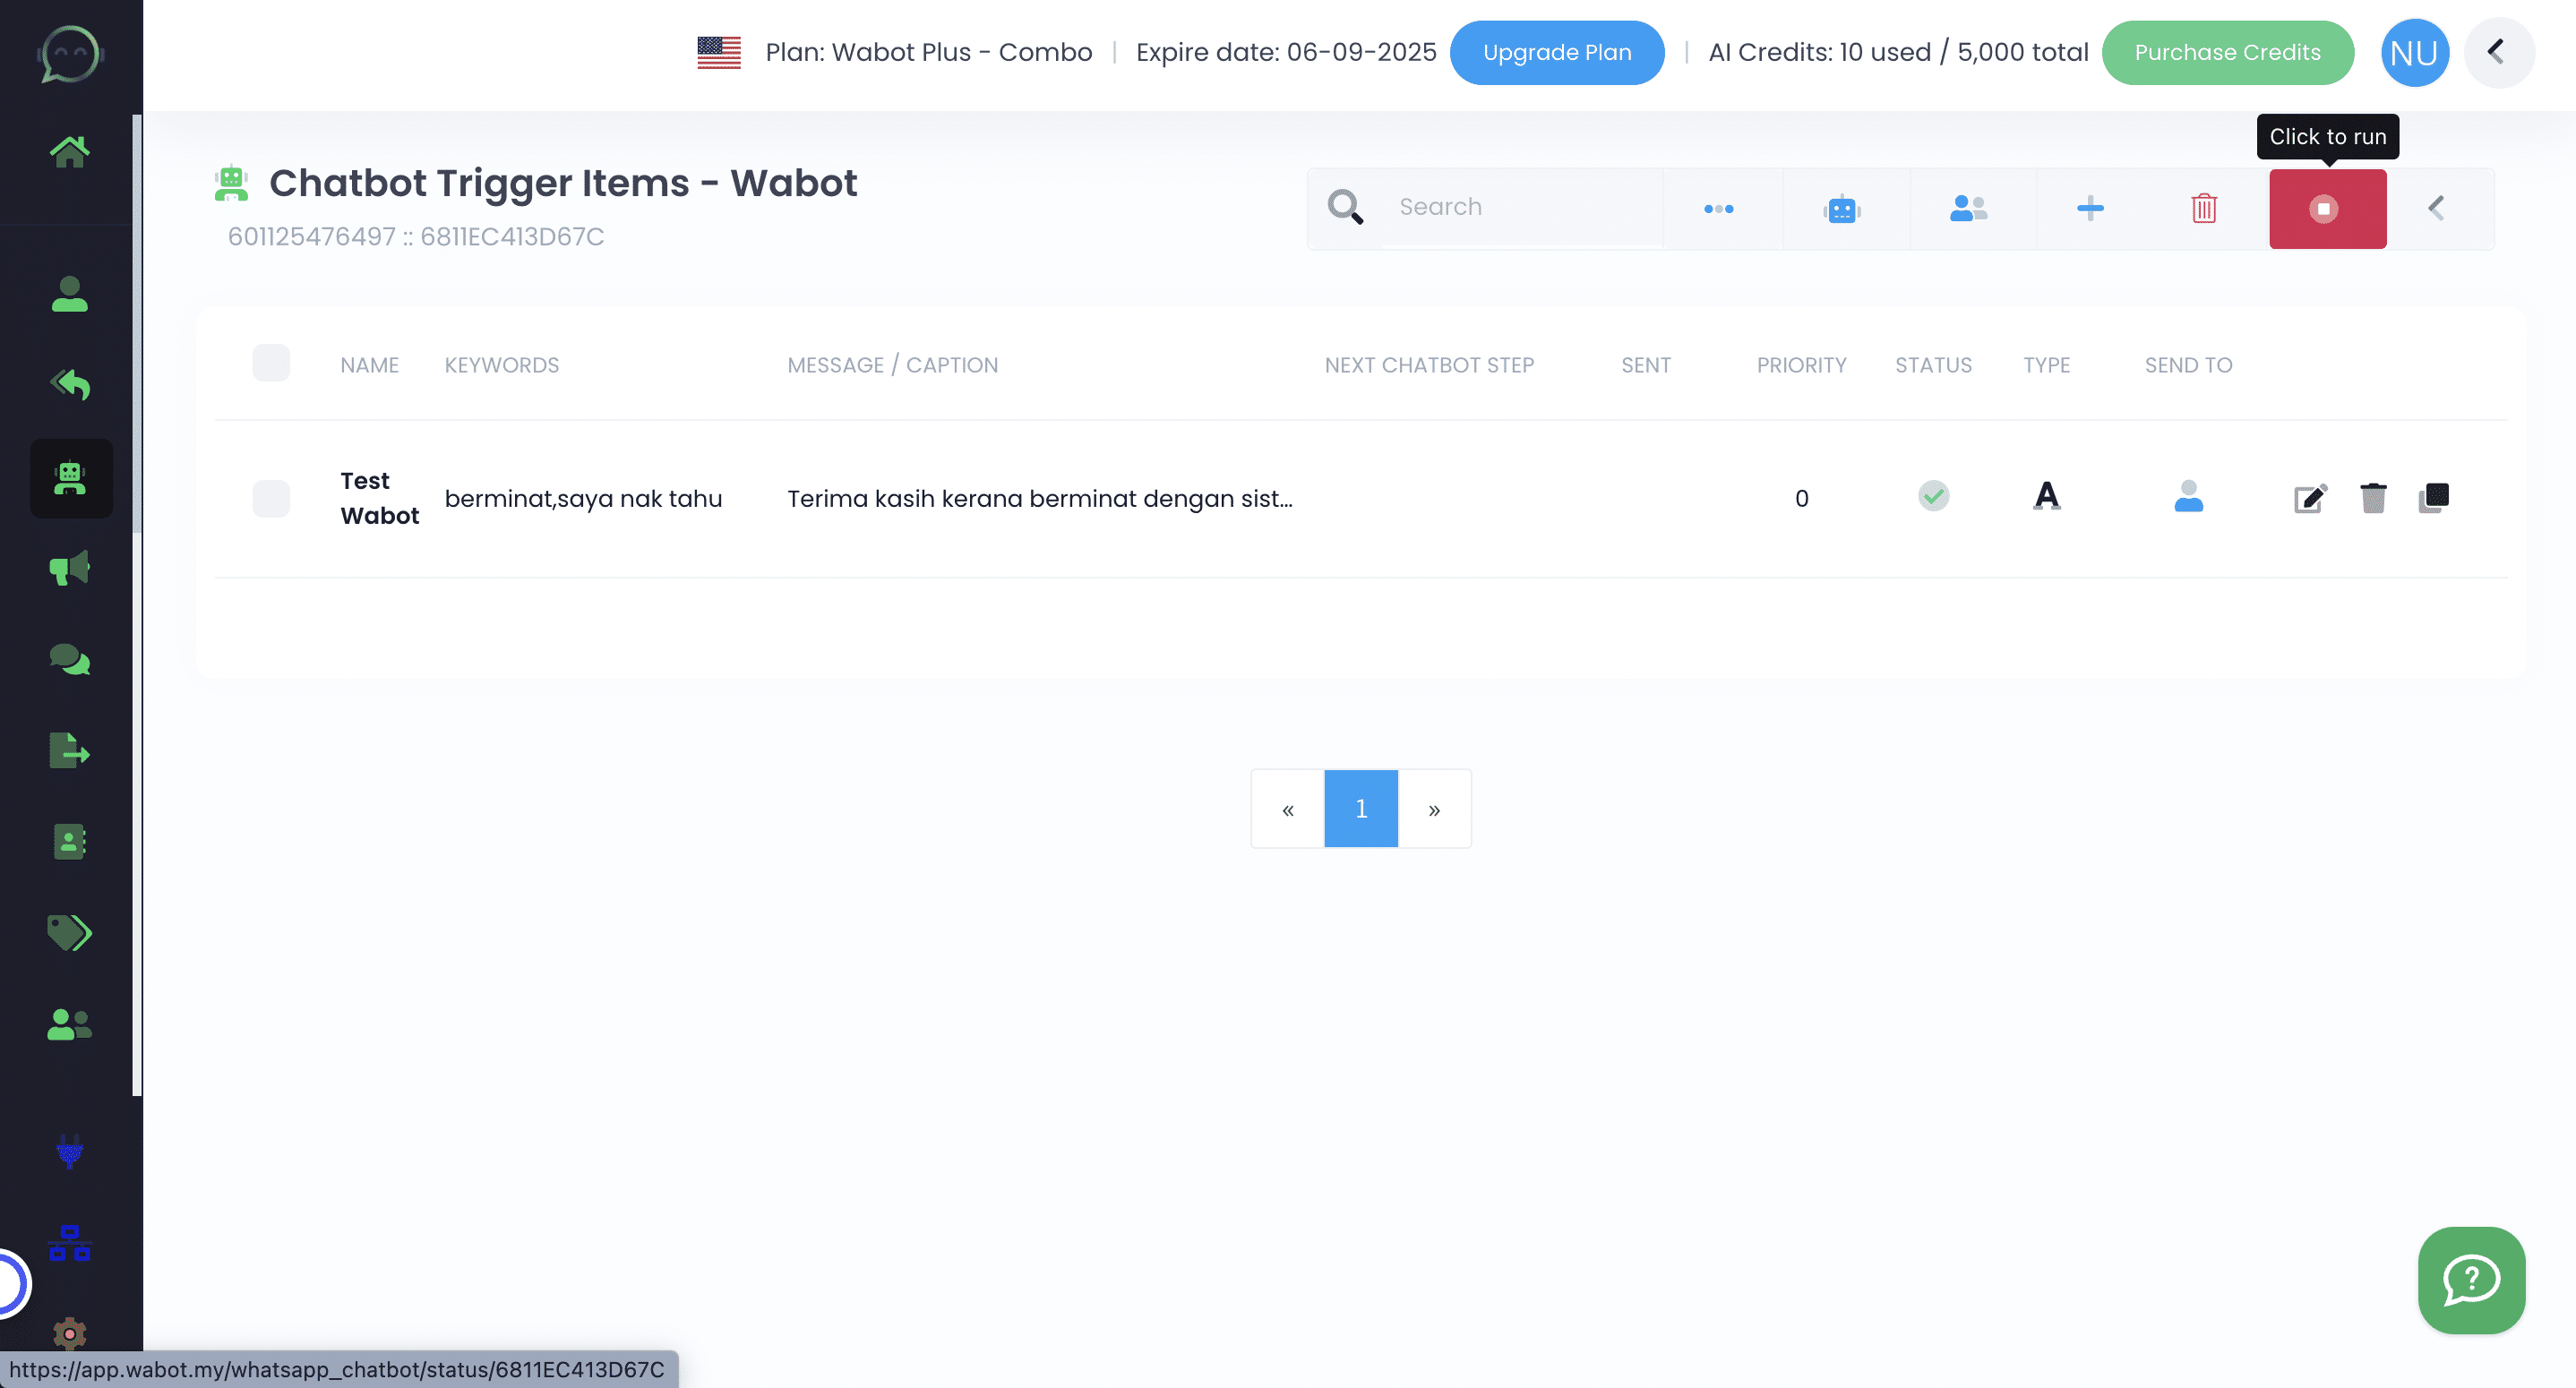
If the icon has turned green and keeps moving, that means your chatbot is working.
Done 🚀